157

When plugging a USB stick into a Mac, OS X creates a number of hidden files on the stick, including a Spotlight index and Trash folder.

Example from the terminal for a USB stick "Untitled":

$ ls -a /Volumes/Untitled
.Spotlight-V100
.Trashes
._.Trashes
.disk
.fseventsd

It even does this on the xD memory card for my camera, so after having copied my pictures and deleted them from the card, the card is still full.

Is it possible to turn this off for USB and memory cards, so OS X either writes these files to the primary disk or doesn't write them at all?

1
  • Comments are not for extended discussion; this conversation has been moved to chat.
    – bmike
    Commented Aug 10, 2018 at 0:50

23 Answers 23

25

UPDATED March 2018 It seems my solution is not valid anymore, the solution that works right now is proposed by @ElmerCat in one of the answers below.

He is suggesting to use CleanMyDrive 2

Deprecated Solution

As I know you have 2 choices :

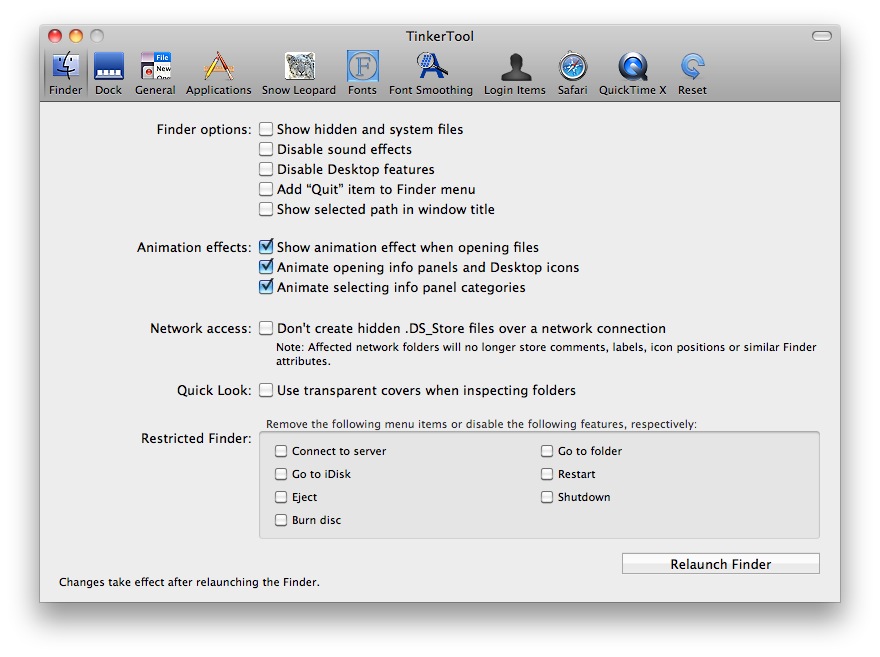
  1. TinkerTool (free)

alt text

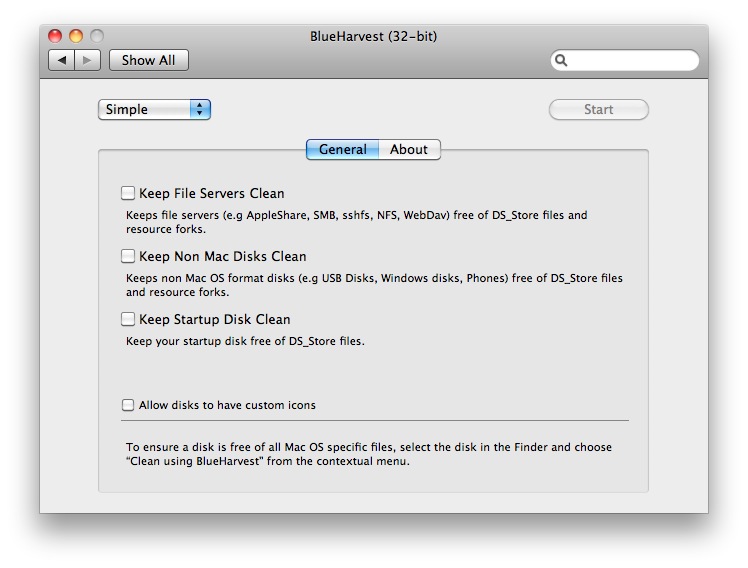
  1. BlueHarvest (commercial)

alt text

12
  • 1
    OK, thanks. Was kind of hoping that there would be a built-in setting somewhere, but at least there's a solution available. Commented Jan 20, 2011 at 18:08
  • 3
    @Philip: Unfortunately Tinkertool only deals with .DS_Store files according to their detail page, which presumably means that this is the only hidden file that can be disabled through the CLI - the other files need custom tools. But BlueHarvest looks nice, and does what I need. (Found some more details on the issue here and here) Commented Jan 20, 2011 at 18:47
  • 1
    outdate! later answers are better
    – user55379
    Commented Aug 19, 2013 at 9:46
  • 1
    @j-g-faustus Not only Tinkertool only deals with .DS_store files but it does so just for network fileysystems
    – nhed
    Commented Apr 14, 2014 at 16:23
  • 2
    Tested it. Tinkertool doesn't work on USB drives (on 10.9 at least)
    – pufferfish
    Commented Jun 15, 2014 at 19:21
116

For just a particular mounted volume - like a flash drive called yourUSBstick in this example - these commands will remove existing cruft, stop Spotlight indexing now and in the future, stop the related fsevents logging, and disable the Trash feature.

mdutil -i off /Volumes/yourUSBstick
cd /Volumes/yourUSBstick
rm -rf .{,_.}{fseventsd,Spotlight-V*,Trashes}
mkdir .fseventsd
touch .fseventsd/no_log .metadata_never_index .Trashes
cd -

Other unfamiliar stuff you may still see you probably want to keep, like Apple double "._*" files and other Apple DS cruft relating to icons and window placement.

8
  • 11
    While this may disable indexing, those files and directories will still be present on the volume (which is the annoying part in the first place), and if you delete them .Spotlight* and .fseventd will come back. In fact, .metadata_never_index is one more entry in the file listing than the usual cruft. Commented May 21, 2011 at 8:02
  • 1
    +1, Actually, I came up with he idea of touching trashes myself and went here for a better solution, but having seen this one couldn't resist +1 it. It solves the real problem — stopping car audio from playing trashed files ;) Commented Feb 1, 2012 at 19:33
  • +1 knew this existed but always have to find it when I need it. This is useful if you have more access to the USB drive than to the OSX system.
    – mlhDev
    Commented May 30, 2014 at 13:00
  • 4
    Thanks, I didn't know about "cd -". I've still been pushing pushd/popd :).
    – studgeek
    Commented Dec 6, 2014 at 16:16
  • 2
    This answer would be more helpful if it said which commands did which thing. E.g. which command stops Spotlight indexing now? which command stops Spotlight indexing in the future? etc.
    – LarsH
    Commented Sep 11, 2018 at 17:55
36

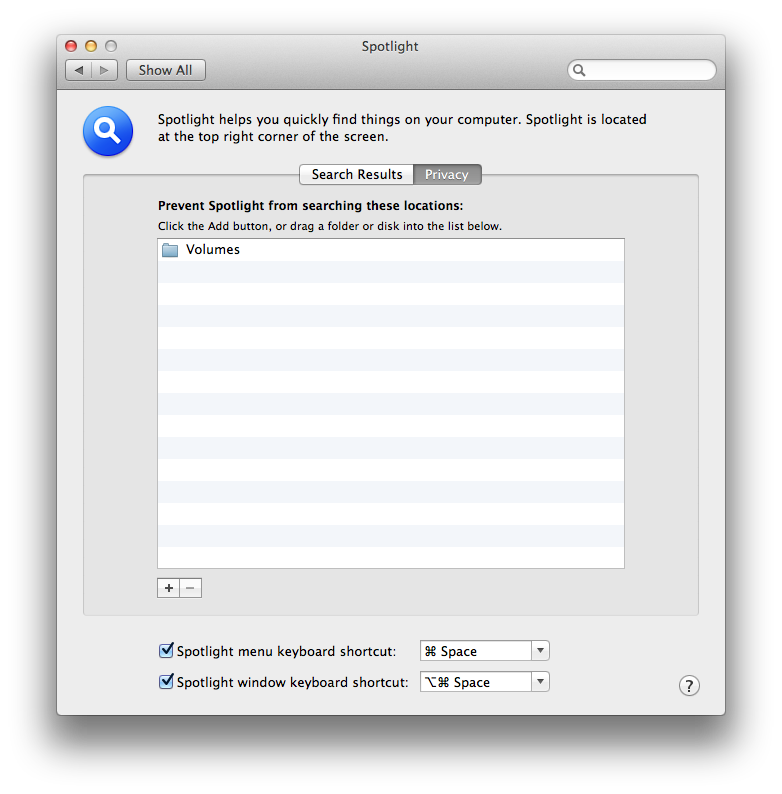
To keep Spotlight from indexing non system volumes, add /Volumes to the Privacy list in System Preferences > Spotlight.

/Volumes is the point in the file system where all non-system disks are mounted by default.

enter image description here

8
  • 1
    impossible to add /Volumes in 10.8; it's possible to add individual volumes one at a time though. I suspect it's similar to mdutil -i off /Volumes/xxx
    – user55379
    Commented Aug 19, 2013 at 9:47
  • 17
    @qarma It is very possible to add /Volumes in 10.8 or later. Simply open a Finder window, press Shift+Command+G to bring up the "Go to folder..." window, type /Volumes, and then drag the little folder icon at the top of the Finder window (next to the word "Volumes") into the list in the screenshot above Commented Nov 20, 2014 at 20:01
  • I'll have to try that out...
    – user55379
    Commented Nov 21, 2014 at 9:02
  • 1
    You can add /Volumes, it just doesn't work.
    – kenny
    Commented Sep 10, 2016 at 17:36
  • 3
    On my machine, the built-in hard drive is at /Volumes/Macintosh HD, so if this worked, wouldn't it stop Spotlight from indexing the HD?
    – LarsH
    Commented Sep 11, 2018 at 17:43
19
  1. Insert the USB drive.

  2. Navigate to Macintosh HD > Applications > Utilities and open Terminal.

  3. At the Terminal prompt, type the following command, replacing path_to_volume with the real path:

    sudo mdutil -i off /path_to_volume

  4. Press return.

  5. If prompted for a password, type your admin password, then press return. You will receive the response:

    /path_to_volume/: Indexing disabled for volume. in Mac OS X 10.4 or

    /path_to_volume: Indexing disabled. under Mac OS X 10.5 or later.

    Spotlight will immediately cease to index the specified volume.

  6. If you are using Mac OS X 10.5 or later, skip to step 9.

  7. At the Terminal prompt, type the following command, again substituting the correct path:

    sudo mdutil -E /path_to_volume and press return

  8. If prompted for a password, type your admin password, then press return. You will receive the response:

    /path_to_volume/: Volume index removed.

  9. At the Terminal prompt, type exit then press return.

  10. Quit Terminal.

Thanks to thexlab.com, their troubleshooting Mac OS X e-books, and their website for the detailed explanation of why other methods sort of work.

2
  • 1
    Note sudo asks for the current user's password
    – mmmmmm
    Commented Feb 16, 2013 at 8:21
  • 1
    This worked for me. Disk usage by Spotlight went from 2GB to 200k. The fact that spotlight takes up so much disk usage on an empty disk is insane. I wonder if we can pull together this solution and some kind of USB-based trigger script, which detects which kind of USB device is in there and runs this command automagically. Any ideas on that?
    – Otheus
    Commented Sep 30, 2016 at 0:37
16

Update — 2021 December

I tested the latest version of Clean My Drive 2 on an M1 Mac, and am happy to report it still works perfectly. The developer continues to update and support the app, which is still free on the Mac App Store.

(previous remarks below still apply)

2017 December

You'd think after all these years, Apple would build something into the Finder to deal with this. It's still a very common problem for people using USB disks or SD cards to play media in their cars or other devices.

Nonetheless, developers have filled the void with numerous Apple-approved apps. The apps listed in previous answers might have been good at the time, but they haven't been maintained to work with modern versions of macOS.

I'd also be a bit wary of installing something that will wield total control of the filesystem, written by unidentified developers. Not wanting to deal with the App Store is one thing, but not wanting to register with Apple as a developer is another. Moreover, something from the AppStore has undergone at least minimal auditing by Apple and can be removed from your computer as easily as it is installed.

So, whenever you happen to read this "answer", its advice to you is to search the App Store for something up-to-date, well reviewed, and free.

TL;DR:

My choice on ***December 20th, 2017*** is "CleanMyDrive 2" from the App Store. Solves the problem, lovely interface, completely free. (Offers in-app purchases of customized icons. Otherwise, everything works for free.)

Tomorrow, something better may come along, but the bottom line is: the App Store has free, easy solutions to j-g-faustus' original but enduring question, posed here so many years ago — a question I had myself today.

So I apologize if this seems more like a rant than an answer, but indeed, all of the previous answers were out-of-date and didn't lead to a useful solution. Not saying something would lead more people to waste time fiddling with the Terminal or installing questionable apps. Just go to the App Store — you won't need to pay.

1
15

Another way to deal with (just the) spotlight files, is to add that volume to your Spotlight exclude list. Plug the device in, and go to the Spotlight prefpane in System Preferences. Select the Privacy tab. Now drag that volume from your desktop up into the privacy list.. or use the + button at the bottom to add it. No more spotlight indexing will happen on that volume.

1
  • 1
    Unfortunately, volumes seem to get removed from the privacy list whenever they're unmounted. So this would have to be repeated every time you plug your memory card or USB stick back in.
    – LarsH
    Commented Sep 11, 2018 at 17:45
13

Update for Catalina and later

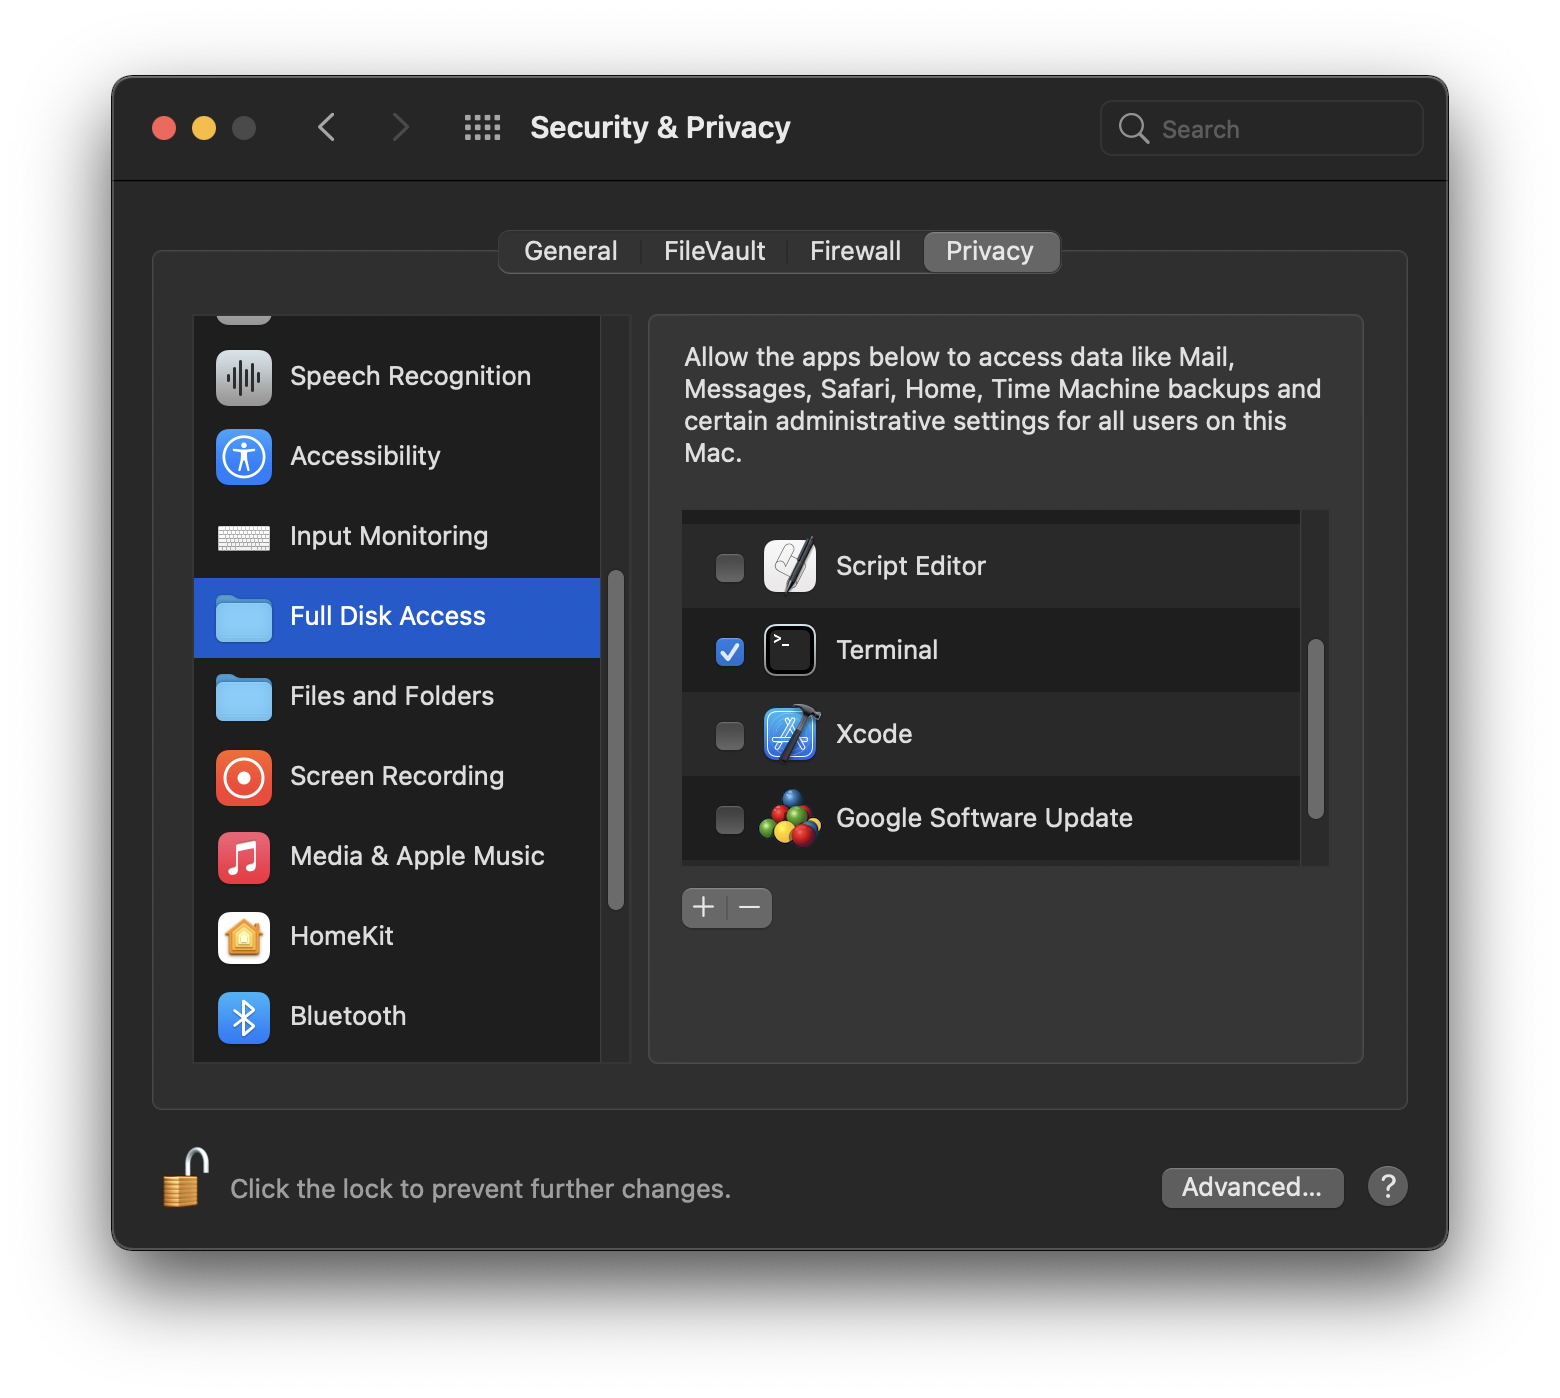
On Catalina and later, you might get an error saying "Operation not permitted" when trying to delete metadata stores on removable volumes using Terminal. To fix this, enable Full Disk Access for Terminal in System Preferences > Security & Privacy.

Full Disk Access, macOS Big Sur

Now, if you haven't done so already, disable Desktop Services Store for USB volumes and turn off Spotlight indexing for the volume:

sudo defaults write com.apple.desktopservices DSDontWriteUSBStores -bool true
sudo mdutil -i off /Volumes/<FS NAME>
sudo rm -rf .{DS_Store,fseventsd,Spotlight-V*,Trashes}

The first line disables .DS_Store files being created on USB volumes and only needs to be run once. The next two lines turn off indexing for Spotlight and delete the files. These need to be run every time the volume is mounted. Although you could add a script to launchd that will run when the volume is mounted, example https://superuser.com/a/132128

1
  • TimD, you are a gentleperson and a scholar. Commented Jan 29, 2023 at 23:32
12

MacOS now provides this direct flag that you can toggle from Terminal:

defaults write com.apple.desktopservices DSDontWriteUSBStores -bool true
1
  • 6
    Good answer for part of the question. This disables the DSStore, but the question was specifically concerning Trash and Spotlight files, which your solution (from what I can read) does notthing about.
    – Otheus
    Commented May 7, 2018 at 7:41
7

Actually touching the .Trashes file will be the best way to solve your main problem since .Trashes is now a file instead of a folder. This means that Apple can't relocate the files to the .Trashes folder when you delete them and your drive is no longer full.

Another option is to hit Cmd-Opt-Shift-Backspace to force Finder to empty the .Trashes content on the card before you eject it.

The first method is really the best as the second affects all Trash contents on all drives.

However, it seems from your post that you are more worried about the pollution of the drive by the various dot files. If you follow the steps mentioned above, you'll save your disk space, but there will be a minimum of dot files created.

0
7

@ Miles Leacy's post

and @ qarma's comment:

No, this is still possible even in OSX 10.9, but you need to do a few extra steps now:

1) In Finder click Go then click Go To Folder...

2) Type /Volumes and click Go.

3) A Finder window will open, and it should say Volumes at the top.

This is the most important step:

4) Next to where it says Volumes at the top of the Finder window, there is a tiny blue folder icon. Click and drag this icon left into your Favorites panel.

5) Now you will have access to your Volumes folder anywhere, including in Spotlight settings like Miles Leacy suggested. (Whenever you need it, just click on the Favorites link to select it.)

Hope this helps,

Best,

Vlad :)

~ ~ ~

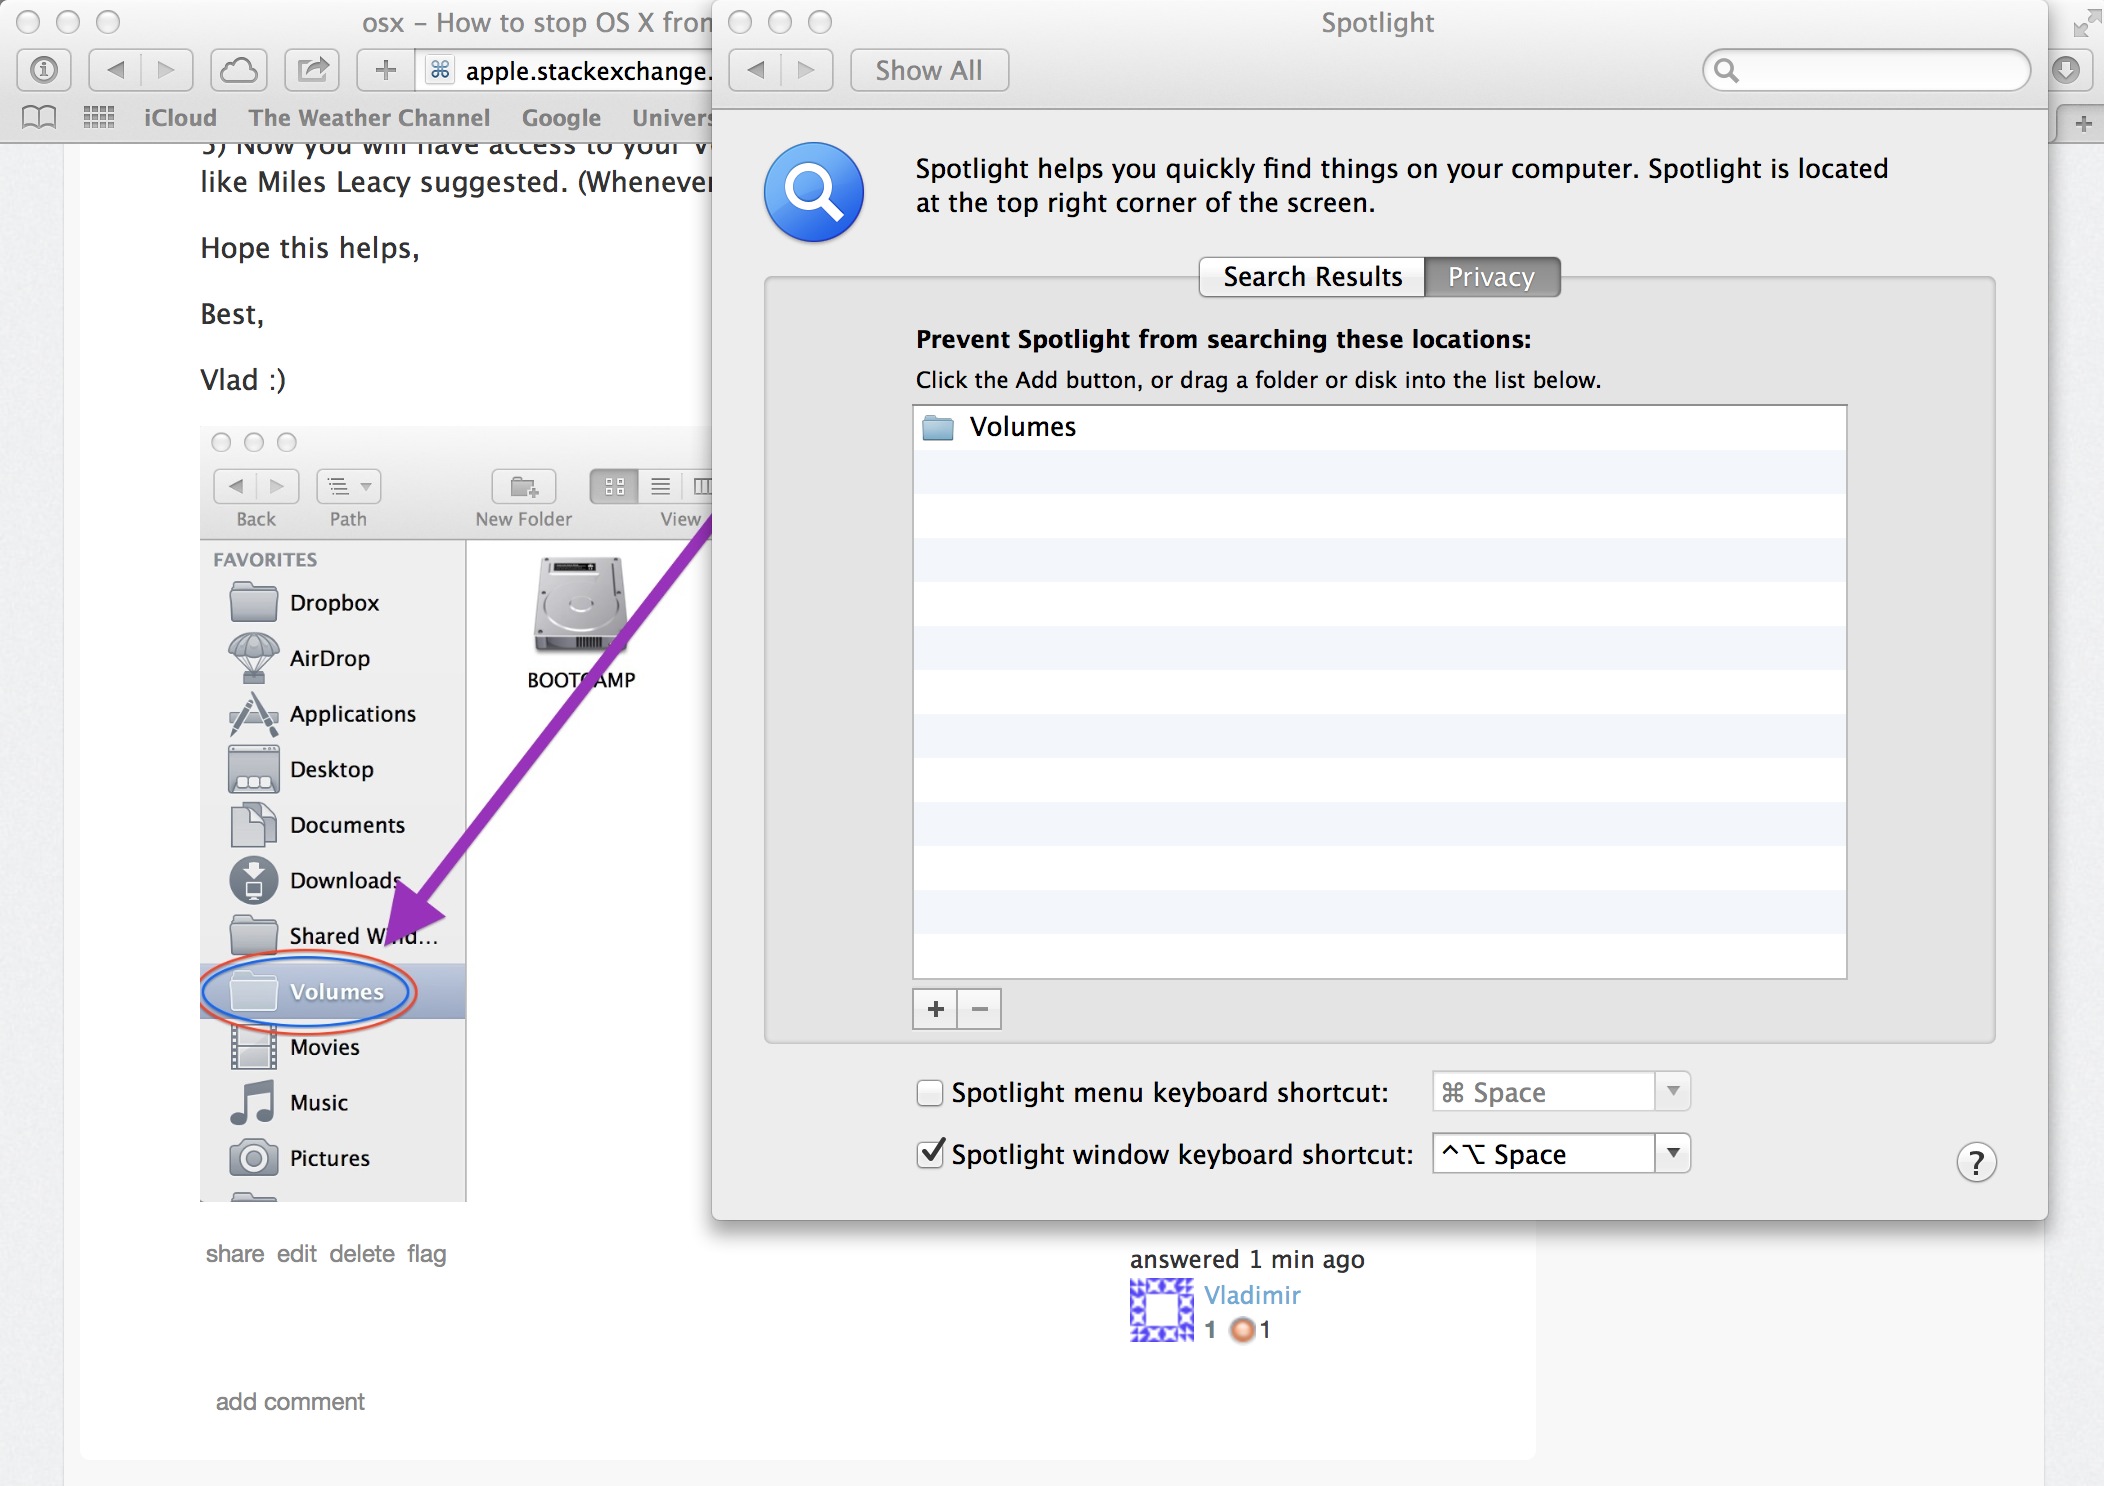
How to add the Volumes folder to your Favorites so that you can access it in the Spotlight settings

~ ~ ~

What it looks like after adding the Volumes folder to the Spotlight exceptions list:

Notice in the background you can see my post in Safari. ;)

What it looks like after adding the Volumes folder to the Spotlight exceptions list

3
  • 1
    FWIW, I think this is a fine answer and does not need to be a comment. I'd remove that part from it and leave it as is. Commented Jan 1, 2017 at 20:09
  • Since the Mac HD is a subfolder of Volumes, doesn't this disable Spotlight on the Mac HD too?
    – LarsH
    Commented Sep 11, 2018 at 17:46
  • @LarsH Good question. I don't like spotlight, and have it completely disabled on my mac nowadays, so I'm not sure. :3
    – Vladimir
    Commented Nov 4, 2018 at 17:13
6

I use the MacOS Terminal command line to list and delete all these files and folders before ejecting the device from the desktop. For some files, you may have to sudo the /bin/rm command.

2
  • That's what I do too. Although it would be even better if I didn't need to, so I'm investigating the alternatives. Commented Jan 20, 2011 at 20:26
  • By the way, the device is found somewhere at /Volumes/<name>
    – DerMike
    Commented Jan 21, 2011 at 11:31
5

I use Clean Eject (free). It doesn’t stop writing the files but will intercept the drive before it gets removed, so it’s better than a tool that you have to run separate from the eject process..

In addition I use a custom Automator Service (also free) to be able to assign a hotkey to clean & eject a volume using the app.

4
  • Without access to the Automator Service you mentioned this answer isn't actually very helpful. Can you share the service as well?
    – nohillside
    Commented Jan 9, 2014 at 10:54
  • 1
    The answer is absolutely helpful - you can use the app without the Automator action. If you want to add a special shortcut key for Clean Eject then you have lots of options: Alfred, Keyboard Maestro. The Automator action is not essential, but is useful. I will upload it when I can to: gingerbeardman.com/services Commented Jan 10, 2014 at 12:35
  • The service I use to Clean Eject selected finder volumes is now uploaded to by site (see above for link). Commented Jan 10, 2014 at 12:56
  • Thanks for the upload, makes the answer much more complete.
    – nohillside
    Commented Jan 10, 2014 at 13:25
4

Dumbest thing ever that I can't simply contribute this to Metaxis' answer. But it's easy to create a bash script that automatically handles this for all folders in /Volumes (or a specific one if you specify). Should be able to invoke it with Automator or Applescript when a folder appears under /Volumes, then you have automatic disabling of indexing.

#!/bin/bash

if [ -n "$1" ]; then
    if [ ! -e "${1}/.metadata_never_index" ]; then
        echo "mdutil -i off $1"
        mdutil -i off "$1"
        cd "$1"
        rm -rf .{,_.}{fseventsd,Spotlight-V*,Trashes}
        mkdir .fseventsd
        touch .fseventsd/no_log .metadata_never_index .Trashes
    fi
else
#    echo "finding Volumes"
    find /Volumes -type d -maxdepth 1 -mindepth 1 -print0 | xargs -0 -n 1 "$0"
fi
4

The built-in dot_clean terminal command will remove ._ files:

dot_clean /Volumes/name_of_drive

and merge them into the existing files, thus not loosing any data.

That does still leave .Spotlight-V100 and others, though.

3

Old question, but I, finally, discovered Asepsis. This is an open source utility that solves this age-old problem by confining all the .DS_STORE directories in one place, by default /usr/local/.dscage
After installation, and a reboot, no more .DS_STORE on USB drives, with the advantage (for some of us) of not having to disable indexing on external drives. Since version 1.4 it also supports OS X Mavericks.

Update from Aepsis website: "Warning: Asepsis is no longer under active development and supported under OS X 10.11 (El Capitan) and later.

0
2

An easy way to stop my car audio trying to read hidden Mac OS files is to remove them in Windows OS. Simply copy your MP3 music to the USB stick from iTunes. Swap the stick into Windows OS and select view hidden files from folder options. This will then allow you to delete every single hidden file that your trusty Mac placed on your USB stick including those pesky .trashes files. Finally a use for Windows OS!

1
  • +1 It is a bit tedious, but sure, why not, it does get the job done haha.
    – Vladimir
    Commented Dec 10, 2014 at 6:08
2

I ended up using a free app "Hidden Cleaner". My car's MP3 player was trying to read .(MP3filename).mp3 (hollow, empty mp3 files) as well. Go to Macintosh HD in Devices section on the Finder left hand menu and drag your USB drive and drop onto the Hidden Cleaner app. It will cleanup the hollow files and leave the real MP3s and will eject your USB.

Note: That is not a permanent solution. You need to do above everytime you copy files. I don't mind though.

2
2

Most of the solutions here are 'clean up dotfiles before eject', rather than 'prevent dotfile creation'.

In my search for a free solution for the former, I've tried a few options, and settled on the applescript here: SuperUser: Does anyone have a Mac Terminal script to remove hidden files? because it allows me to see exactly what's happening along the way.

Note in my comment on that answer that I made a small edit to get it working on OSX 10.12.1. (I'm not reposting the source in this case, as this seems a pretty 'link friendly' question).

1

I got this to work on Sierra 10.12.3 in Automator.

First, I made this version of the script: It functions the same way as freefly42's, just a different way of writing the same thing.

To translate for non-native bash speakers, what it does is:

If run with a commandline argument, it tries to see if the argument is a directory, and if that directory contains a file named ".disable_osx_metadata".

If the special file is not there, then nothing happens. That drive is ignored.

If the special file is there, the script deletes all the osx metadata and creates a few small new items which prevents anything else. For instance, creating a file named .Trashes prevents the OS from creating a directory named .Trashes and then writing files in there.

If run with no arguments, it runs itself once for each directory in /Volumes.

So, if you run it manually or click on it, it checks all attached drives. If you create a workflow in Automator, then Automator runs it whenever a drive is attached, just for that drive.

#!/bin/bash
x=.disable_osx_metadata
[[ "$1" ]] || exec find /Volumes -type d -maxdepth 1 -mindepth 1 -exec $0 {} \;
[[ -e "$1/$x" ]] || exit 0
mdutil -i off "$1"
rm -rf "$1"/.{,_.}{fseventsd,Spotlight-V*,Trashes}
mkdir "$1/.fseventsd"
touch "$1/.fseventsd/no_log" "$1/.Trashes" "$1/$x"

Save as "disable_osx_metadata", chmod 755, copy to /usr/local/bin .

$ cd Documents/disable_osx_metadata/
$ chmod 755 disable_osx_metadata
$ sudo cp disable_osx_metadata /usr/local/bin

Then open Automator, New, Folder Action

Then I found that even in Sierra 10.12.3 you CAN still add the /Volumes directory in Automator, by a non-obvious way.

Go to Finder, File, "Go To Folder...", manually write in "/Volumes" and hit Enter.

Now this shows you a window with your HD and usb drives, but no obvious "/Volumes" folder to click on. But the title bar says "/Volumes", and it appears at the bottom too.

You can drag the folder icon next to "/Volumes", either from the title bar or from the bottom, over to the Automator, and drop it on "Folder action receives files and folders added to:[______]"
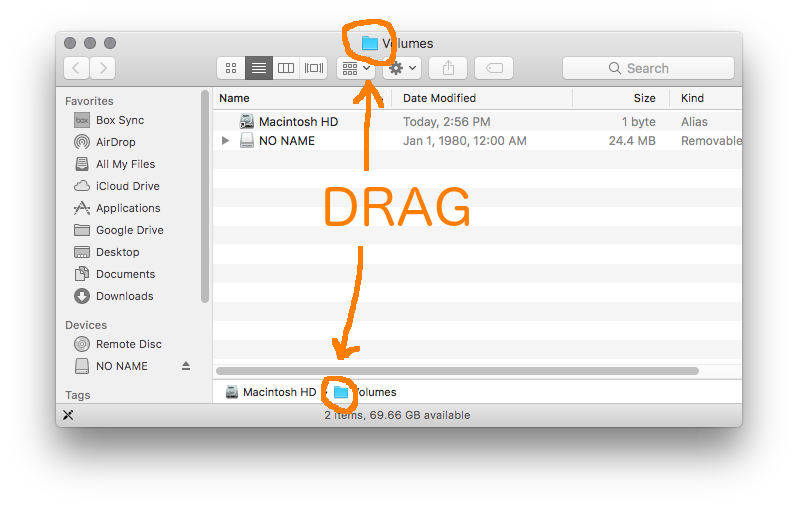
Drag /Volumes from Finder Title Bar

Close Finder.

Back in Automator: on the left, scroll down and drag "Get Folder Contents" to the right and drop it.

Then on the left again, scroll down and drag "Run Shell Script" to the right and drop it below "Get Folder Contents".

Change "Pass input:" to "as arguments". Shell:[ /bin/bash ] Pass input:[ as arguments ]

Then drag the script from /usr/local/bin onto the box under "Run Shell Script" so it says "/usr/local/bin/disable_osx_metadata"

File, save, disable_osx_metadata.workflow
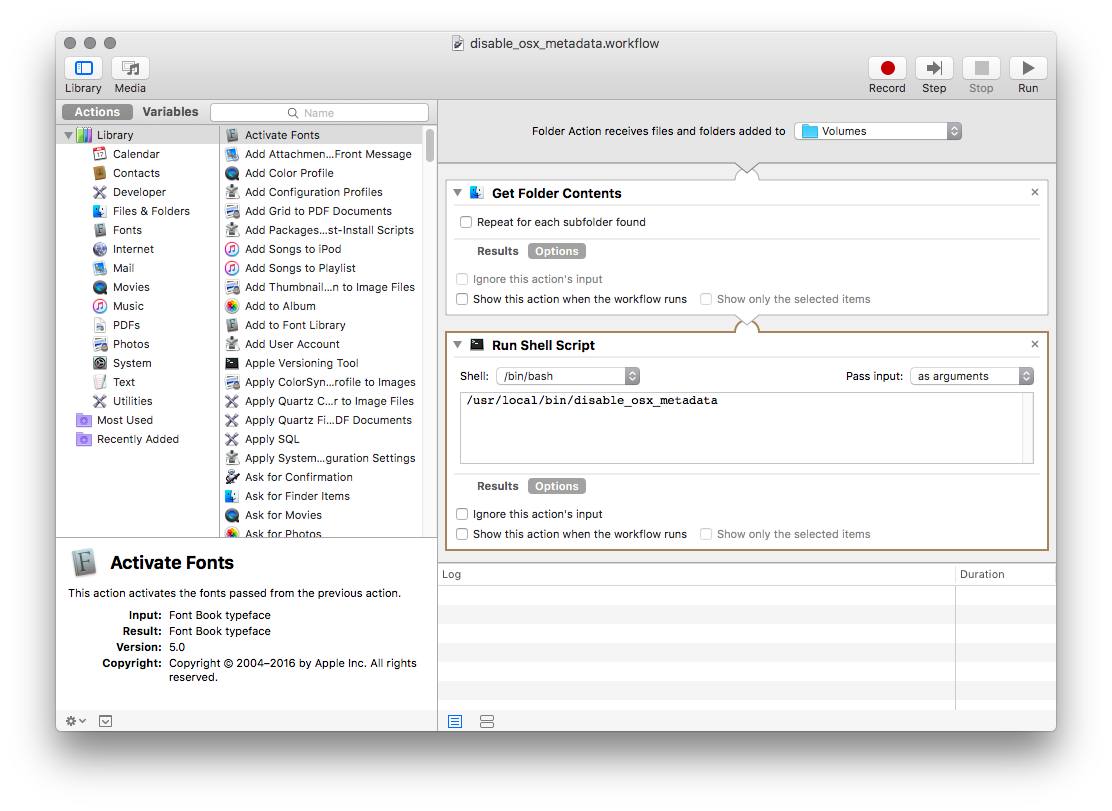
Automator Folder Action Workflow

For reference, this gets saved in: /Users/YOUR_NAME/Library/Workflows/Applications/Folder Actions If you save something wrong, I think you have to manually navigate there in Finder to delete it.

Finally, for each new usb drive you want to protect, you have to create a file named ".disable_osx_metadata" in the root folder.

You can do it in Terminal: $ touch /Volumes/NO\ NAME/.disable_osx_metadata

Or just keep a small text file around with a visible name (no leading dot) and copy it to the root of any new usb drive and rename it .disable_osx_metadata after copying.

That drive now gets cleaned each time you attach it from now on.

Not as clean as I'd like. You have to pollute the drive a little, in order to tell the OS not to pollute it more. There seems to be no way make the OS simply leave it alone and not add any files that you didn't ask for.

TODO: Add enable/disable functions to create/remove the dot-file.

TODO: This does not prevent the .DS_Store files in every directory.

TODO: Is it possible to package up the script and the foo.workflow file so a user can skip most of these manual directions? I see there is an "export" option in Automator that creates some sort of package file.

TODO: Possibly obsolete this whole post. This applescript + automator workflow might be better: https://superuser.com/questions/319553/does-anyone-have-a-mac-terminal-script-to-remove-hidden-files/814104#814104

0
1

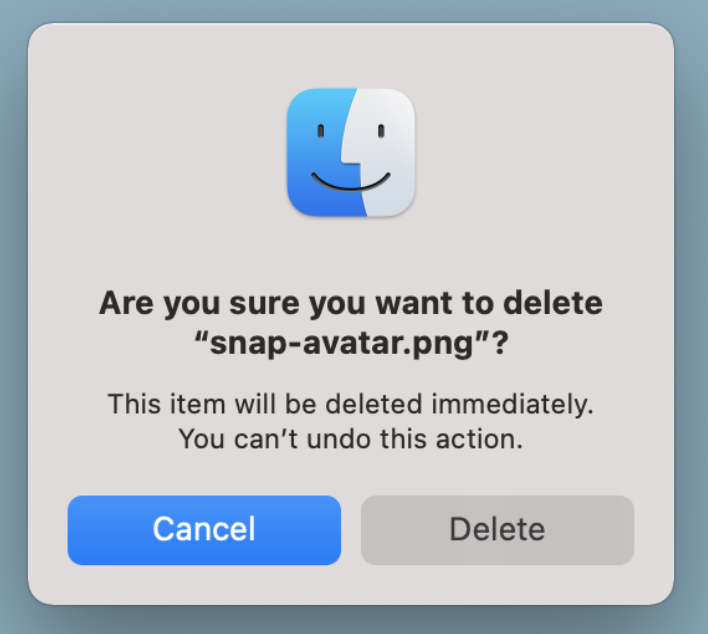
macOS stores deleted files in the .Trashes folder. You can stop it from doing this by turning the .Trashes folder into a file. You can do this in the Terminal:

sudo rm -rf "/Volumes/CARD NAME/.Trashes"
sudo touch "/Volumes/CARD NAME/.Trashes"

Replace CARDNAME with the name of your SD card, which you can see in the Finder sidebar.

Finder is aware of this, and when you tell it to move an item to the trash on that volume, it will warn you that the item will be deleted immediately.

Warning that the item will be deleted immediately

-1

Another OSX utility for removing these extra files is DOTCLEANER which can be found on the OSX App Store.

https://itunes.apple.com/us/app/dotcleaner-ds-store-remover/id1113480556?mt=12

1
  • Does this tool prevent the writing of dot files or just clean up after it happens?
    – bmike
    Commented Sep 7, 2022 at 14:24
-1

Currently, Cleanmydrive2 is available on the app store for free and handles this problem for user up to high sierra.

1
  • I’m going to mark this -1 since it doesn’t prevent the write, but it may help automate the clean up efforts. Please update this with details and references how this tool works if my information is wrong.
    – bmike
    Commented Sep 7, 2022 at 14:14
-1

I found this App in the Apple App Store for free and use it, and it has worked great for me: CleanUSBDrive by José A. Jiménez Campos.

2
  • Costs 4$ in 2022.
    – cachius
    Commented Sep 7, 2022 at 12:19
  • @cachius thanks for the edit. Can you explain if this tool prevents the write or just cleans after it happens?
    – bmike
    Commented Sep 7, 2022 at 14:23

You must log in to answer this question.

Not the answer you're looking for? Browse other questions tagged .