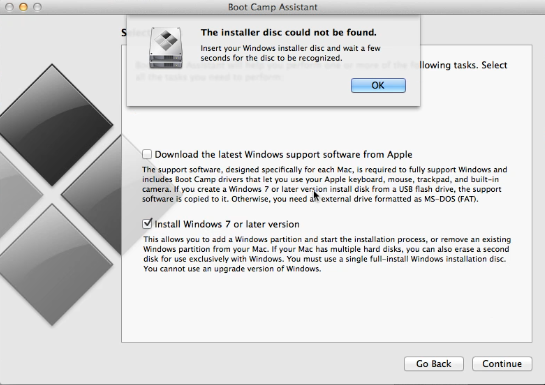
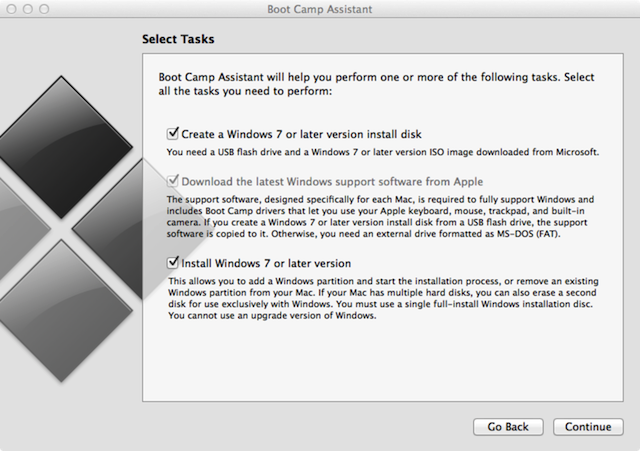
There is no option in the Bootcamp wizard to choose the Windows ISO.. Any ideas?

There is no option in the Bootcamp wizard to choose the Windows ISO.. Any ideas?

I followed this tutor here and got success: https://www.youtube.com/watch?v=hE8If6gabUI.
The "Create a Windows 7 install disk" option is hidden because your system's capabilities are limited. For instance, older Macs can not boot from external USB disks, therefore creating an installer onto a USB disk would make no sense.
Still, if you want to create an installer on an external disk regardless, all you have to do is edit Boot Camp Assistant's "Info.plist" file:
- Open Package content of Boot Camp Assistant app, backup
Info.plistfile somewhere, then open the old one with XCode.- Edit file:
- Edit section's title:
PreUSBBootSupportedModelstoUSBSupportedModels(if it's alreadyUSBBootSupportedModels-> skip this step)- Add your System's
model identifier(Find it bySystem Informationapp) intoUSBSupportedModelssection.- Add your
Boot ROM version(Find bySystem Informationapp) toDARequiredROMVersionssection- Save.
- Restart BootCamp
A comment of @dusanvf:
If your Bootcamp crashes after this, write this into terminal:
sudo codesign -fs - /Applications/Utilities/Boot\ Camp\ Assistant.app/
PreUSBSupportedModels to PreUSBBootSupportedModels etc.) Unfortunately, though, the Mac Pro won't boot from a normal USB drive, either. So I guess I need to fix the DVD drive in the Mac before I can do this.
Commented
Aug 9, 2015 at 12:48
<br>s.
SupporedNonWin10Models
Commented
Sep 3, 2017 at 7:01
Here is the page which helped me to enable this option Create a Windows Install USB on OS X Yosemite.
Creating a Windows installer from OS X is actually quite simple - Boot Camp Assistant can do it for you. If you’re on a newer machine without an optical drive, you probably have an option that says “Create a Windows 7 or later version install disk”. Click that and point it to your ISO image. Done.
If you’re on an older machine (like my Hoth), you won’t find this option. Don’t Panic! Hacking Boot Camp Assistant into small bits and reassembling it will do the trick.
First of all, we’ll modify Boot Camp Assistant’s Info.plist. It’s at
/Applications/Utilities/Boot Camp Assistant.app/Contents/Info.plist. Open it in your favorite text editor. (Note: this requires elevated privileges).Note: If you are running OS X 10.11 or newer, you will be unable to edit
Info.plist. Instead, copyBoot Camp Assistant.appto your desktop, and follow the instructions using the copy.Once we’re in
Info.plist, we’ll tell it which machines can create USB disks. Look for the key PreUSBBootSupportedModels. Change it to USBBootSupportedModels. Makes sense, right? Save.Then, we’ll need to resign Boot Camp Assistant, otherwise it will refuse to run. For this, we’ll need the Xcode command line tools installed. Then it’s as easy as
sudo codesign -fs - /Applications/Utilities/Boot\ Camp\ Assistant.appNow restart Boot Camp Assistant, and you’ll find the option you were looking for.
If anybody is struggling with this on Mojave (10.14) it's pretty simple:
pre from PreUSBBootSupportedModels, so only USBBootSupportedModels remains and add your model in there.ExternalInstallOnlyModelsIf the "Create a Windows 7 or later install disk" check box does not appear, then this usually means an USB flash drive can not be used to install Windows on your Mac. An example of this check box is shown below. Since your Mac does not show this check box, I assume you have an optical drive. You need to burn the iso image to a blank DVD using the Disk Utility application.
Now there are ways to make this check box appear so the files can be copied to the flash drive, but most likely the firmware in your Mac will not allow you to boot Windows from a flash drive. Even if you can boot to OS X using a flash drive, this does not mean you can boot to Windows using a flash drive. You may need to boot to Windows from the optical drive to install it on to your internal drive.
Steps to burn an iso to DVD: (Taken from Burn ISO in Mac OS X)
As for the drivers for Windows. You can either download them using the Boot Camp Assistant or download them from Boot Camp: System requirements for Microsoft Windows operating systems. You install the drivers after you finish installing Windows.
One final note: Do not change the partitioning using anything from Microsoft. The partitioning can only be successfully changed using OS X software. The only exception is Windows can format the BOOTCAMP partition.

This is correct. You need to have a bootable media with Windows on it to install Windows on bootcamp. When the process reboots to install Windows, the .iso will be unmounted and useless.
You can write the ISO to a flash drive (8GB or more) using disk utility and use that.
Actually, if I recall correctly, the Bootcamp installer should make the bootable install media (8GB flash drive) itself.
If you just mount the ISO so that it shows up as a disk (double click on the ISO) that may be all you need to do. The BootCamp Assistant will then see the file as a (virtual) drive and copy the necessary files to your install media.
Here as an article that describes how to get the option back http://tsentas.net/create-a-windows-7-or-later-version-install-disk-missing-on-el-capitan/