1

I've tried everything... went into recovery tried repairing. Went into terminal tried to list any existing snapshots. Nothing... Am I going to have to do a clean wipe of the drive because of this Catalina disaster of a release...

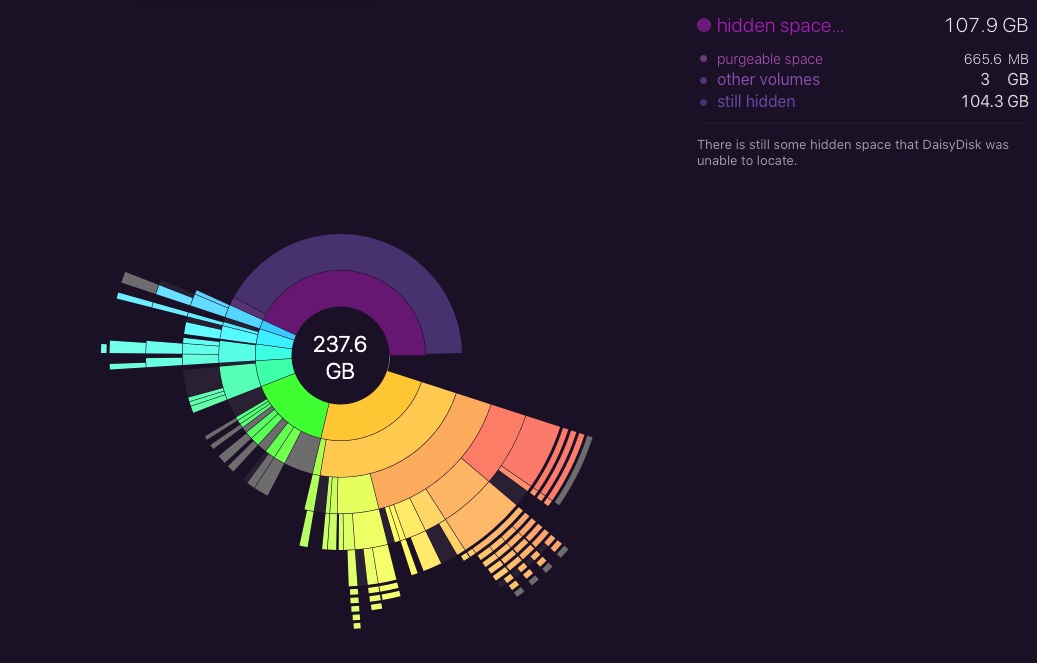
enter image description here

Here's also a screenshot of About This Mac > Storage:

enter image description here

5
  • 1
    Do you use  > About this Mac > Storage > Manage… Store in iCloud? If so, your purgeable data is not all Time Machine snapshots. Also check the free space in Storage against that in Disk Utility > Free vs. Available & see apple.stackexchange.com/a/370809/85275 which has an explanation of how the purgeable data structure works [but isn't an answer to your question]
    – Tetsujin
    Commented Oct 23, 2019 at 18:10
  • Edited with pic of Storage showing 166.81GB of Other. iCloud is fully setup and photos album only taking 800MB+ only that's full of video, photos from the past few years.
    – Tom
    Commented Oct 24, 2019 at 15:48
  • 2
    I wonder whether that's the system drive… is that DaisyDisk 4.8, or an older version? Try daisydiskapp.com/manual/4/en/Topics/HiddenSpace.html
    – Tetsujin
    Commented Oct 24, 2019 at 15:55
  • Hang in there and let the spotlight index catch up. Have you left the Mac running overnight one night without sleep?
    – bmike
    Commented Oct 25, 2019 at 1:00
  • I'd try booting to Safe Boot Mode, which deletes lots of caches as part of it's operation.
    – benwiggy
    Commented Aug 13, 2020 at 13:51

5 Answers 5

5

Expanding on modlin's answer, when using Ncdu:

ncdu /

on macOS, you can avoid the firmlink problem by excluding /System/Volumes/Data:

ncdu --exclude /System/Volumes/Data -x /
3

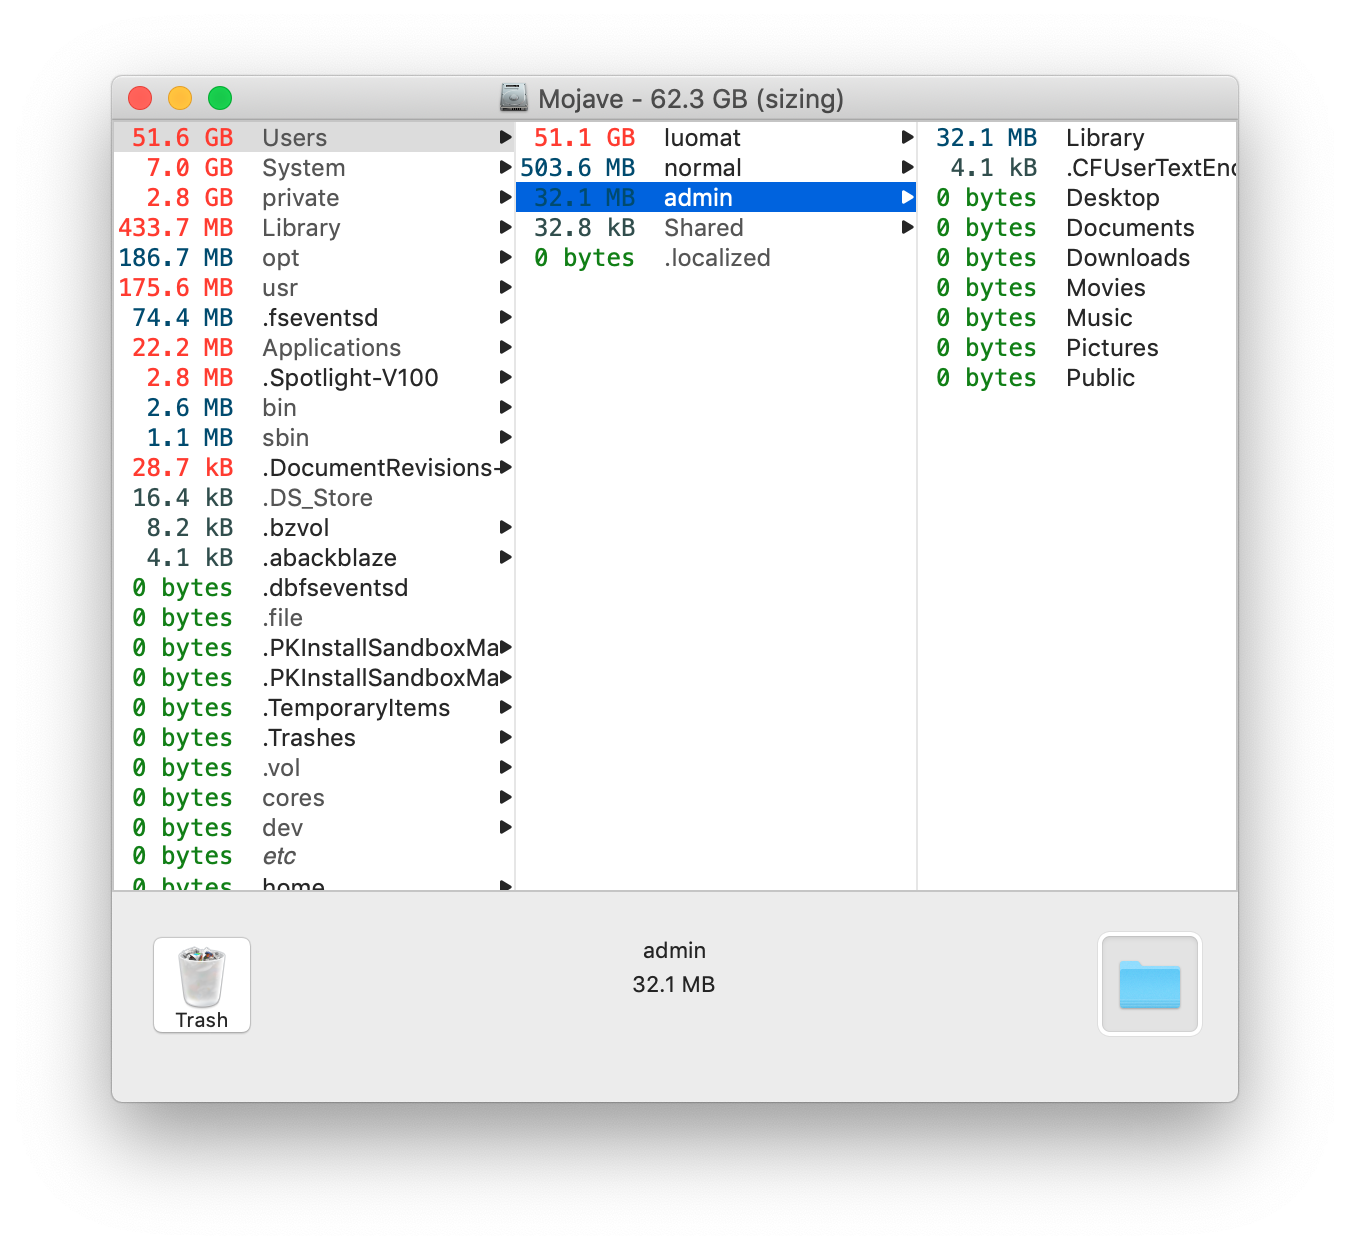
Try OmniDiskSweeper which shows in a column-view:

OmniDiskSweeper screenshot

Largest folders will sort to the top.

I often will run it via

sudo /Applications/OmniDiskSweeper.app/Contents/MacOS/OmniDiskSweeper 2>/dev/null 

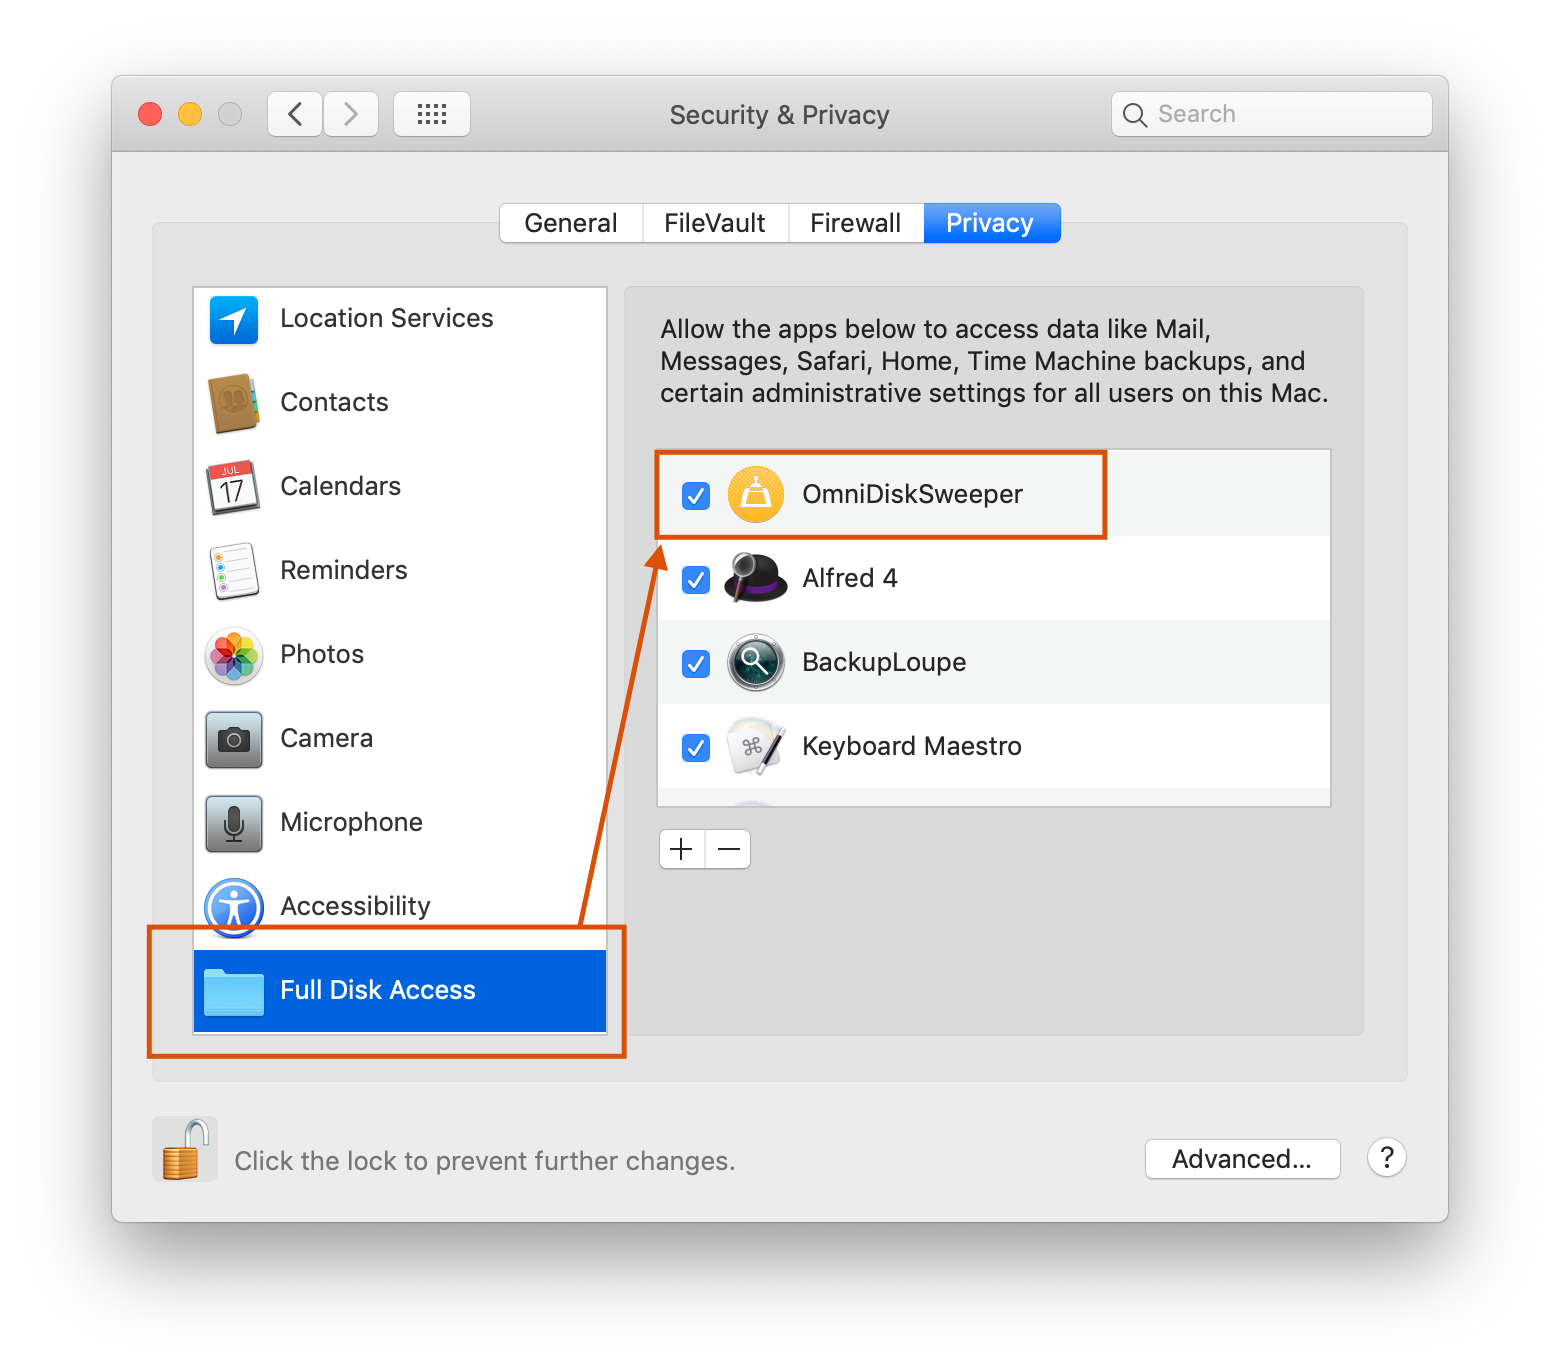
Also: make sure that it gets “Full Disk Access” as shown here:

Screenshot of Security & Privacy

1

Also try 'Boot Camp Assistant', click Continue and then wait.

You are just use it to trigger some cleanup action, not actually installing Windows.

0

All commands are supposed to be run in a Terminal application. In order to see where all this space is:

  1. First, install Homewbrew:

    /usr/bin/ruby -e "$(curl -fsSL https://raw.githubusercontent.com/Homebrew/install/master/install)"
    
  2. With Homebrew install ncdu:

    brew install ncdu
    
  3. run ncdu:

    ncdu /
    
  4. Actually, it's better to start with your home dir:

    ncdu ~/
    

Voila! You'll see where all your space is. You can repeat this step with directories at deeper level than root. It may be required to run ncdu with sudo ncdu for some directories. Also keep in mind that macOS 10.15 Catalina system files are located on read-only partition.

4
  • I was absolutely going to recommend ncdu to crawl both the Data volume and the system volume. Super good tool, mind if I edit in usage for both?
    – bmike
    Commented Oct 25, 2019 at 0:59
  • 1
    @bmike On APFS & Catalina? Really? I don't get it to show the occupied space properly. Reason: firmlinks. ncdu doesn't take the firmlinks into account and re-iterates through this blackhole endlessly. After 4 minutes of scanning it counts 80 GB on my 64 GiB disk.
    – klanomath
    Commented Oct 25, 2019 at 1:20
  • @klanomath Oh jeez, I was lucky where I started it. Yes firmlinks are going to be death to crawlers that cannot check filesystem boundaries potentially under any rock.
    – bmike
    Commented Oct 25, 2019 at 1:23
  • 2
    @modlin At least ncdu / won't work at all in Catalina because ncdu is not firmlink-ready. One firmlink is set at /System/Volumes/Data/ which "loopholes" to /System/Volumes/Data/System/Volumes/Data/ after the first iteration and /System/Volumes/Data/System/Volumes/Data/System/Volumes/Data/ after the second iteration... After ten minutes of scanning it counts 120 GB on my 64GiB disk. Additionally it won't detect snapshots.
    – klanomath
    Commented Oct 25, 2019 at 1:43
-1
  1. Open up a terminal window and enter
  2. cd /
  3. sudo du -sk * (Enter password when prompted)

In addition to printing out a bunch of “permission denied” error messages, that will print out how many 1k blocks each directory contains (although it will miss directories that start with .)

Assuming “bigdir” is a suspiciously big directory, cd into it and repeat:

  1. cd bigdir
  2. sudo du -sk *

Yesterday I found an old 50GB photo library backup in my Dropbox. Turning on Dropbox smart syncing fixed that.

1
  • This is a painfully slow and inefficient method compared with the GUI alternatives.
    – TJ Luoma
    Commented Oct 25, 2019 at 23:19

You must log in to answer this question.

Not the answer you're looking for? Browse other questions tagged .