2

I am following the guide here How to install Windows 10 into a 2011 iMac without using the Boot Camp Assistant, an optical (DVD) drive or third party tools? and everything appears to work until I actually install Windows 10. From the guide mentioned, it seems you boot into the Windows 10 setup that you loaded to your Bootcamp Partition. Then, you type in the command that points to your USB flash drive to initiate the setup.

Right after I type the command, I get the error. It says "0x8007000D windows cannot open the required file D:\sources\install.wim make sure all the files required for installation are available..." I have tried several things to fix this problem. First off, the USB and the Bootcamp partition are ExFat, so they won't have the 4gb limit. I have used older versions of the Windows ISO on the flash drive, but every time I start the setup I get the same error. I have even tried using the Windows Media Creation tool to make a USB drive, and copied the BootCamp5 contents over to it, but when I try to load the AutoUnattended file, nothing happens, not even a new setup window. Any help would be greatly Appreciated.

Also, when I tried just running the setup from the ISO that was on the BOOTCAMP partition (instead of pointing it to the flashdrive), it gave me the same error. Is there a problem with ExFat?

My machine is a mid 2011 21.5 inch iMac running macOS High Sierra.

EDIT: Like I should've done from the start, I downloaded the exact build of Windows 10 that the tutorial used, 1703 from https://tb.rg-adguard.net/ I repeated the steps again and this time, the setup window emerged. So that is a nice workaround. But I would still like to know why the newer build didn't work even when I had ExFat formatted drives.

4
  • In your question you mention trying many different ISO files. For the current release of Windows 10, there is only one correct ISO to be used to install Windows on your Mac. How did you go about acquiring the ISO that you thought was correct?. Commented May 19, 2020 at 15:49
  • Ok first I just downloaded the latest ISO from the typical Microsoft site. This was within the past few days. I followed your original guide using this latest ISO. When that didn't work, people online suggested getting an older version of the ISO where the install.wim file isn't as big. So I found a guide on medium where a guy did just that medium.com/@taig/… and from the mentioned site (also listed in the edit of my answer) I downloaded the ISO with the version that you used, 1709. I then repeated all of the steps, and it worked Commented May 19, 2020 at 20:23
  • Do you know the name of the downloaded file? What language did you choose? So far I am able to install without any problems, although I am testing using VirtualBox. I could post a command line interface (CLI) method of installing which would avoid the problem you are encountering. Commented May 19, 2020 at 21:05
  • Here are the exact things I put into the downloader site: drive.google.com/file/d/18D0M-dEsURT-5ROZfg0w-H6ScGGzjk1e/… as you can see it is normal windows 10, version 1709 64bit with English set as the language. It looks like the hard drive just crapped out on my machine and I will have to repeat this process, so it would be greatly appreciated if you know a way to do this on a newer version of Windows 10. This would allow me to avoid all the updates that probably led to my hard drive having a fuss. Thanks! Commented May 21, 2020 at 16:00

1 Answer 1

4

How to Use the Command Line Interface (CLI) to Install a BIOS Booting Windows 10

Part 1: Build the Installation Flash Drive

Note: The version of macOS is High Sierra 10.13.6.

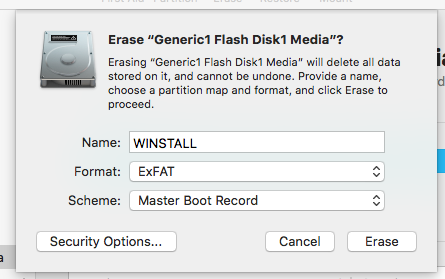
  1. Use the Disk Utility application to erase a 16 GB or larger flash drive. Choose the parameters shown in the image below.

  2. Download latest 64 bit Windows 10 from Microsoft. In my case, this was the file named Win10_1909_Engish-x64.iso.

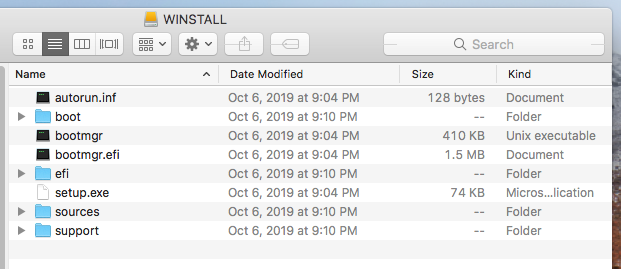
  3. User Finder to mount Windows 10 ISO and copy the files to WINSTALL. When finished unmount the ISO. Below is what appeared on my WINSTALL volume.

  4. From the Safari menu bar, select Develop → User Agent → Microsoft Edge. Click on this link, then download gdisk. When finished, select Develop → User Agent → Default (Automatically Chosen) from the Safari menu bar

    Note: If Develop does not appear on the Safari menu bar, then check off “Show Develop menu in menu bar” in Safari Preferences. To reach the check box, select Safari → Preferences… from the Safari menu bar, then select the Advanced tab.

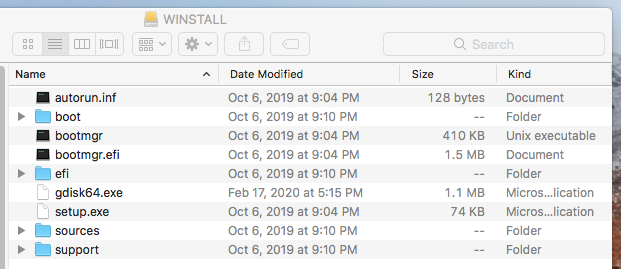
  5. From the gdisk download, copy the file gdisk64.exe to WINSTALL. Below is what appeared on my WINSTALL volume.

  6. Download the latest Window Support Software (Boot Camp Support Software) for your Mac from Install Windows 7 on your Mac using Boot Camp. Or you can try using the Boot Camp Assistant to download the software.

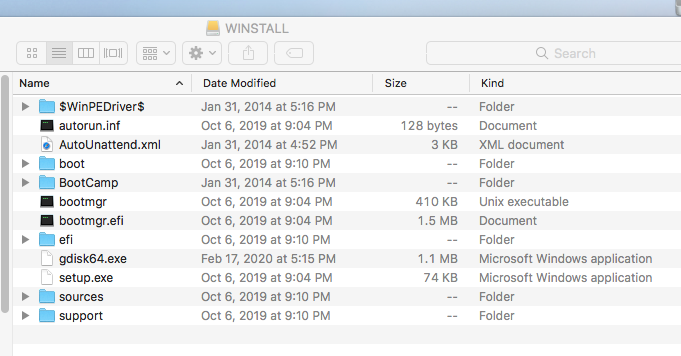
  7. Copy Windows Support Software to WINSTALL. Below is what appeared on my WINSTALL volume. The files came from the website Boot Camp Support Software 5.1.5621.

Part 2: Create Space for Windows 10

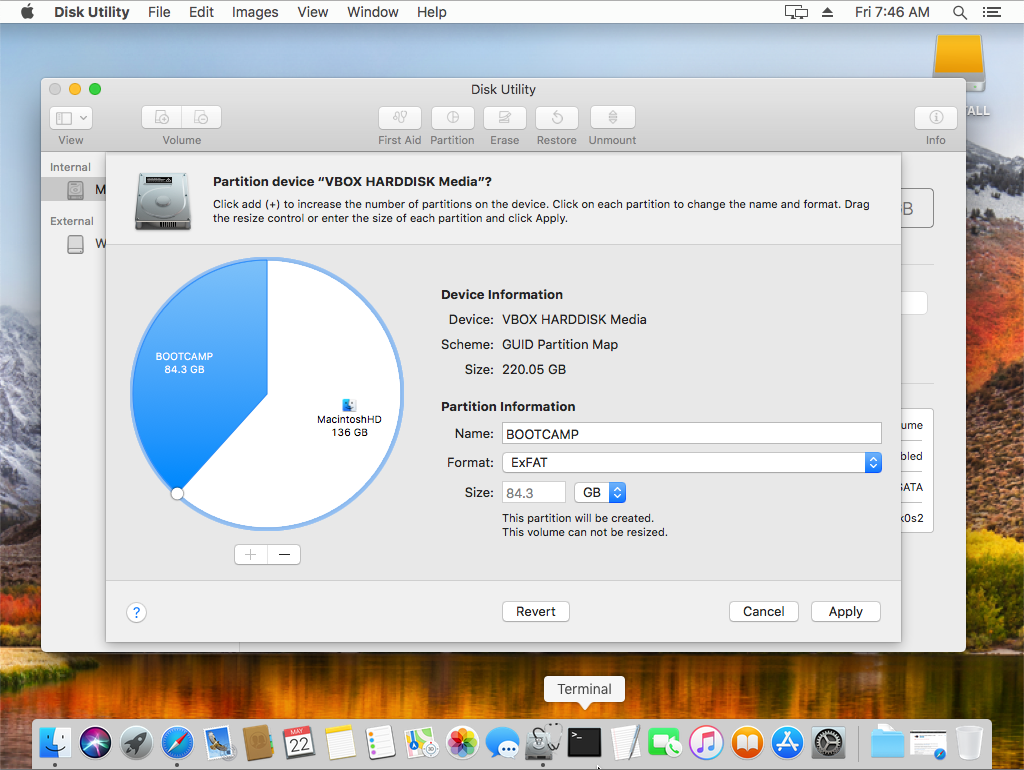
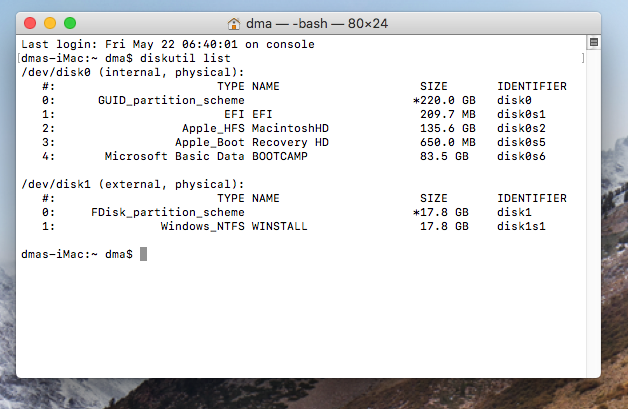
Use the Disk Utility or the diskutil command to create an ExFAT partition for Windows 10.

When finished, the output from diskutil list appeared as shown below.

Part 3: Install Windows 10

  1. EFI boot from the flash drive.
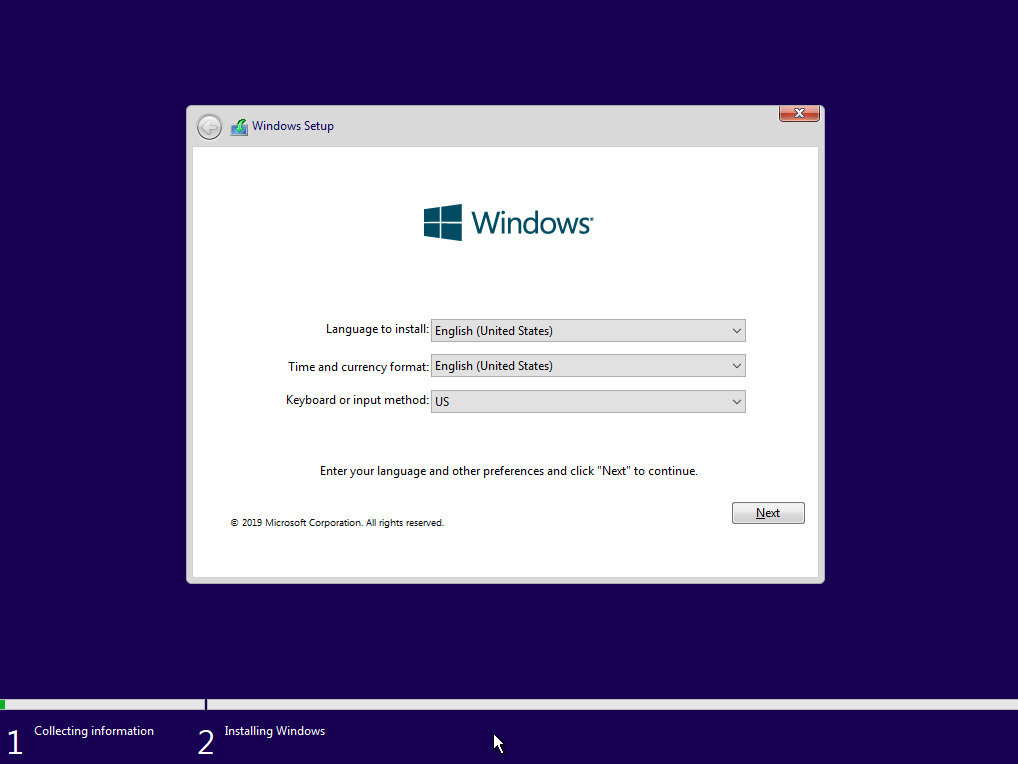
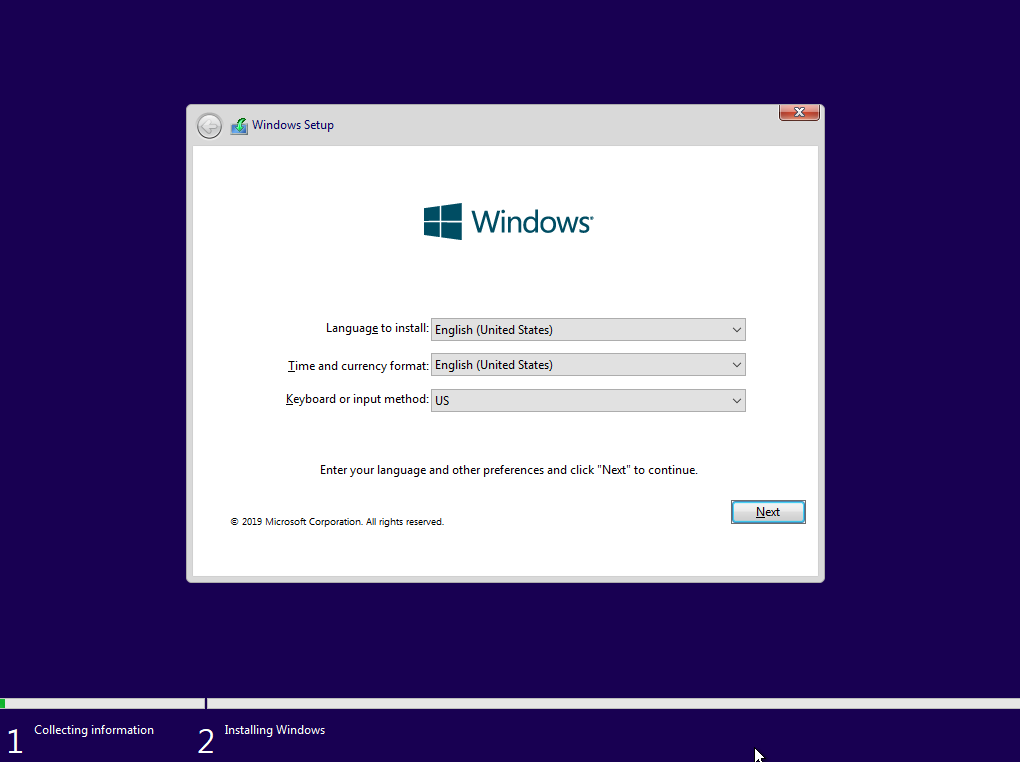
  2. When you see the windows shown below, press the shift+F10 key combination to open a Command Prompt window.

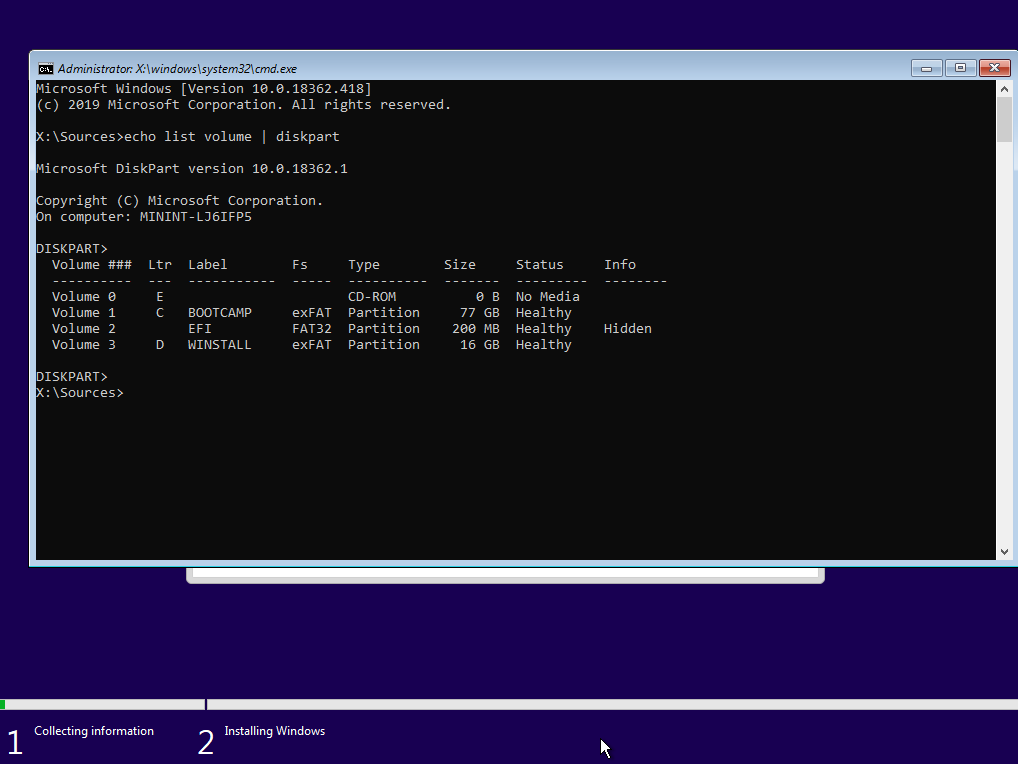
  3. Enter the command echo list volume | diskpart to list the volumes. Below is an image of my results. If you get different drive letter mappings, then make the appropriate substitutions.

  4. Hybrid partition the internal drive. The commands for my configuration are given below.

    Note: The gdisk version is 1.0.5.

    d:gdisk64 0:
    r
    h
    2 3 4
    y
    af
    n
    ab
    n
    07
    y
    w
    y
    
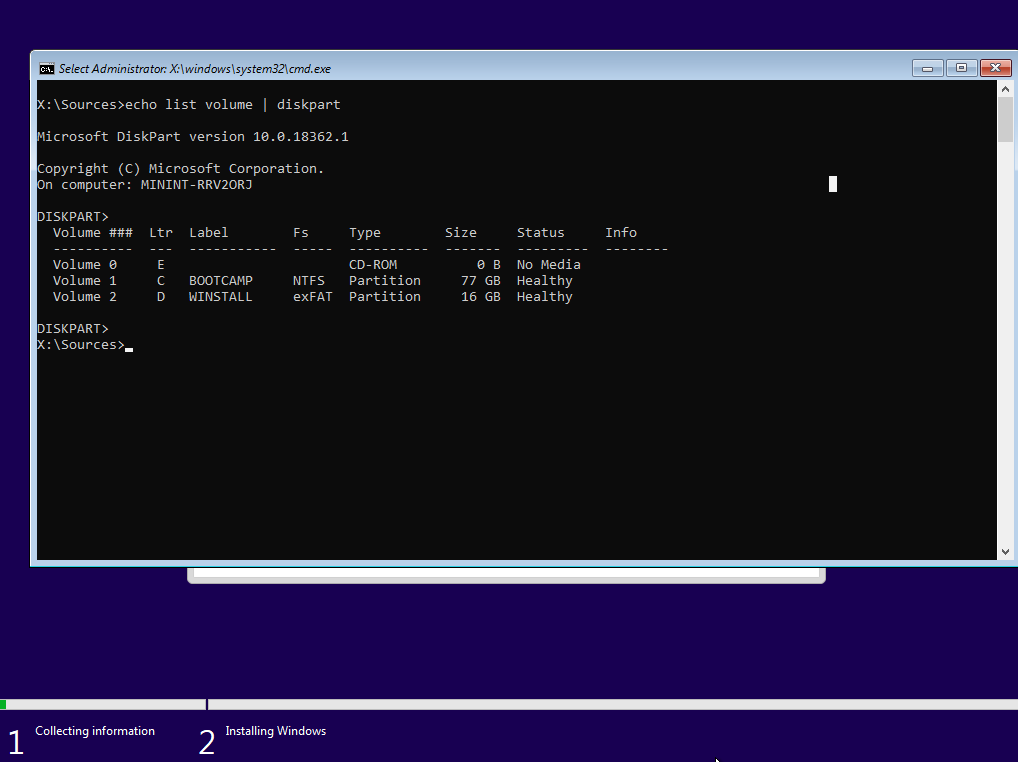
  5. Once again, enter the command echo list volume | diskpart to list the volumes. Below is an image of my results. If you get different drive letter mappings, then make the appropriate substitutions.

  6. Use the command given below to format BOOTCAMP. When asked for the current volume label, enter BOOTCAMP.

    format c: /fs:ntfs /v:BOOTCAMP /q
    
  7. Copy the Windows 10 files to the internal drive. If desired, substitute "Windows 10 Home" in the command given below.

    dism /apply-image /imagefile:d:\sources\install.wim /name:"Windows 10 Pro" /applydir:c:\ /checkintegrity
    
  8. Install the boot data and files for a BIOS boot.

    bcdboot c:\windows /l en-us /s c: /f bios
    
    bootsect /nt60 c: /mbr
    
  9. Close the Command Prompt window by entering the command given below.

    exit
    
  10. When the image below appears, click on the red X, then the Yes button. The Mac should reboot to macOS.

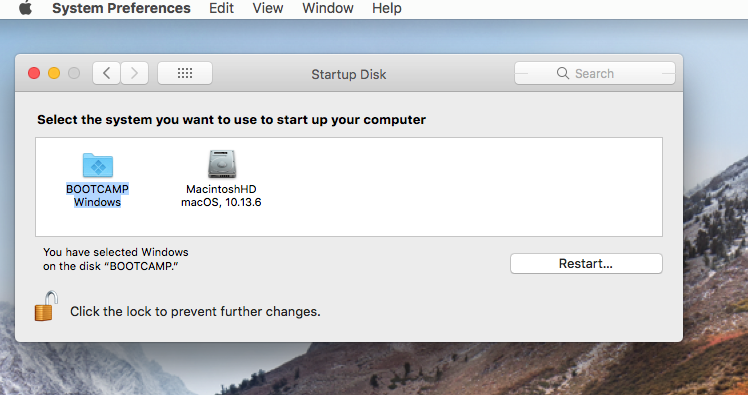
  11. From the Startup Disk pane of System Preferences, select Windows and restart the Mac. Windows should finish installing. Below is an image of the Startup Disk pane after selecting Windows.

  12. Install the Windows Support Software. Basically, try running the setup Application in the BootCamp folder on the WINSTALL flash drive. If the software will not install, then open a Administrator Command Prompt window and enter the command BootCamp.msi in the \BootCamp\Drivers\Apple folder on the WINSTALL flash drive.

  13. Use the Apple Software Update application to install all updates from Apple.

Additional References

DISM Image Management Command-Line Options
DISM Driver Servicing (.inf) Command-Line Options
BCDBoot Command-Line Options
BIOS/MBR-based hard drive partitions
UEFI/GPT-based hard drive partitions
Dual Boot Win 7 on MBR with Win 10 on GPT
How to install Windows 10 into a 2011 iMac without using the Boot Camp Assistant, an optical (DVD) drive or third party tools?

0

You must log in to answer this question.

Not the answer you're looking for? Browse other questions tagged .