2

TL;DR I need to recover lost files from an SSD but don't have the time to do it right now. How can I clone an SSD to another drive on byte level, including drive areas which the OS thinks are free?


I did a cut and paste (Comd+C then Comd+Opt+V) on my Mac 10.14’s Finder to move some .mov files from my internal SSD to my WD My Passport External Harddrive (connected by USB 3.0 with a USB-C to USB adapter. My 15-inch Macbook is the 2018 version which only has USB-C ports, and has the touch bar).

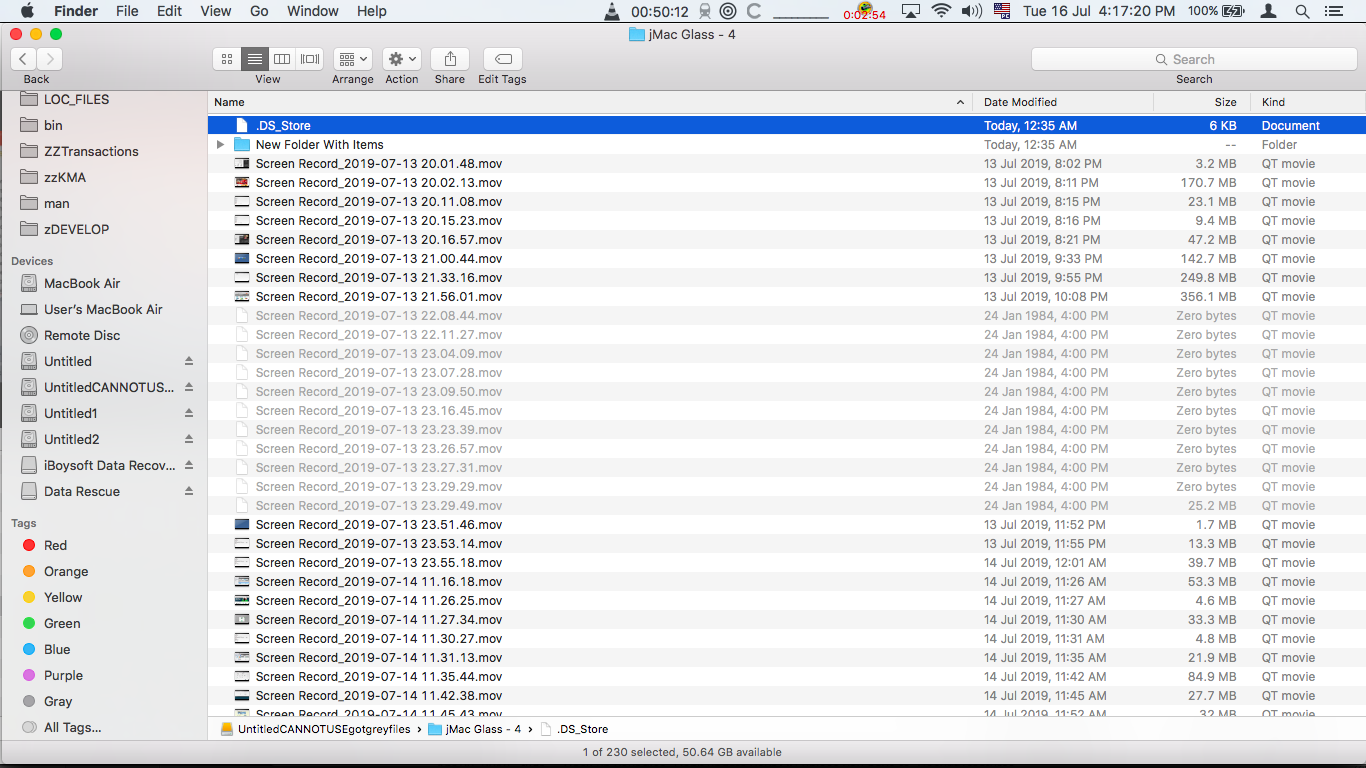
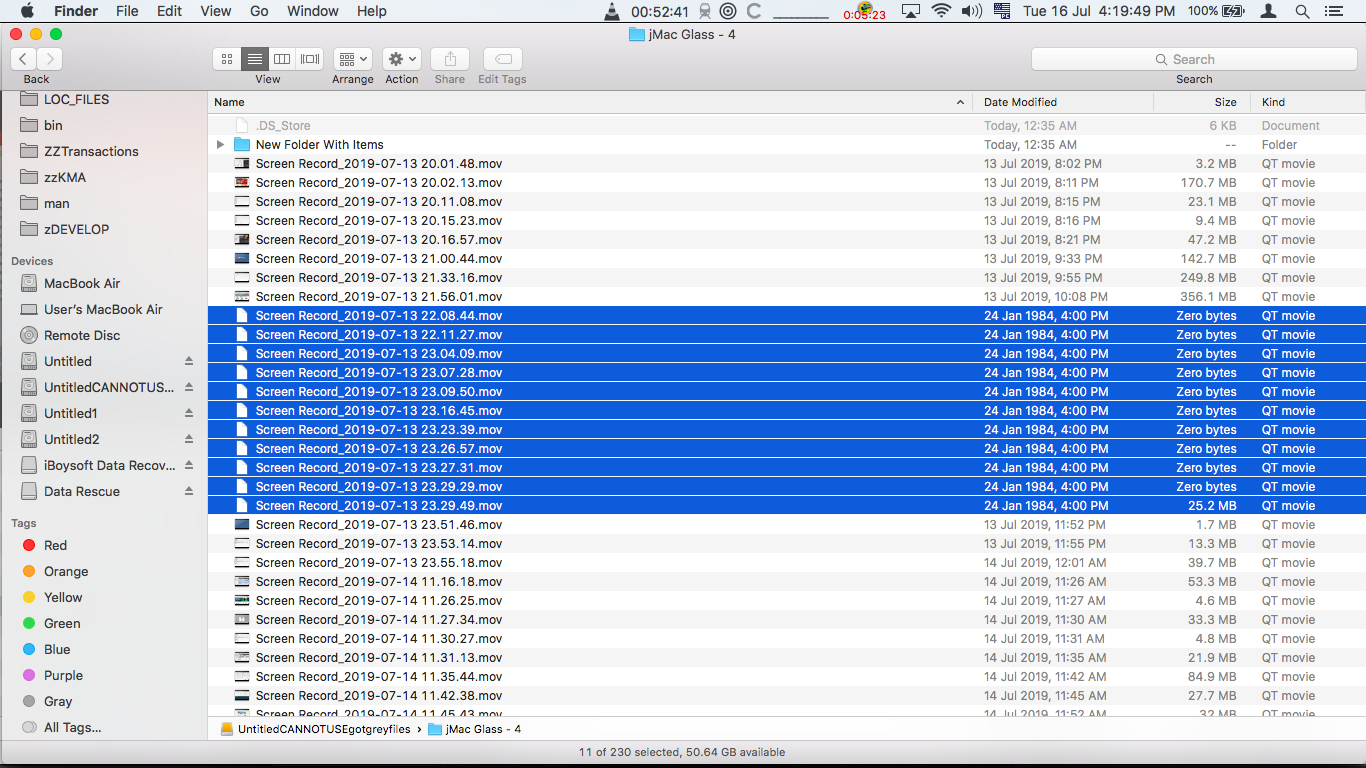
Alas, after a while, I move my Macbook and the connected got unstable, and was eventually lost. To my horror, when I tried to do a transfer again, I see that some files are greyed out on my external WD harddrive (see screenshot), and these files are no more on the original folder on my internal SSD!

enter image description here enter image description here

I tried to recover these files by using the following software on my SSD (**but not on the external hard drive yet) to no avail: Disk Drill File Salvage EaseUS Data Recovery Techtool Pro 11

**I ran the software immediately after discovering the issue, because I know that if I continued using the Macbook, there would be risk that the OS would overwrite my files.

Can someone tell me:

(a) I am so tired of doing all this recovery, and want to move on to something else. But I need to use my Macbook! If I use it, I will definitely overwrite the lost files’ bytes one day. Can I do a byte-for-byte clone of the SSD to somewhere and work on this recovery issue some other time?

(b) If yes, what software should I use and how do I make sure that the clone is both byte-for-byte AND it includes the parts of the SSD that are now seen by the OS as “free” (since that’s probably where the lost files reside?)

(c) For (b), prefer software that can also show me the bytes in hexadecimal so I can inspect manually to see if it’s really byte for byte.

P.S.: For more context, see: Data loss due to lost connection when transferring from Mac 10.14 SSD to External HDD

P.S.: the SSD I am looking to clone is 256GB

4
  • Regarding c: How big is the drive you want to clone that way? Assuming we are talking Gigabytes, how exactly do you intend to do a manual inspection?
    – nohillside
    Commented Jul 17, 2019 at 8:48
  • 1
    In general: This site works better with focused questions, right now I see at least three questions in your post (how to clone, how to verify, how to switch SSD). Some of them probably even have come up before. Can you please focus on one issue per post, and ask additional questions separately?
    – nohillside
    Commented Jul 17, 2019 at 8:49
  • @nohillside ok i have removed the sub-question on switch SSD. how to clone and how to verify - they are so related/connected, i dun think separating them will make sense. can the hold be removed? Commented Jul 17, 2019 at 10:50
  • @nohillside also i have edited question to indicate SSD is 256GB. actually, it's ok if part (c) is not possible. more important are (a) and (b). Commented Jul 17, 2019 at 10:52

2 Answers 2

2

My favorite tool for that is the "dd" command that comes with macOS. It needs to be used from the Terminal, so if that puts you off - there are also GUI alternatives.

"dd" is quite simple and will copy all data - including "free" areas. You take a clone by first rebooting your computer into Recovery mode.

Then mount an external drive where you want to store the backup - make sure it has enough free space to contain the full size of the original drive.

Open Disk Utility to find the device name of your original drive. This is probably something like /dev/disk1s1 or similar. Also, if your original drive has been mounted for some reason while in Recovery mode - unmount it from Disk Utility.

Then open Terminal and run a command like this:

dd if=/dev/rdisk1s1 of=/Volumes/ExternalDrive/clone.img bs=1m

Note that I put an "r" in front of disk1s1 - this bypasses buffers to make the transfer faster.

Also note that the output file name is specified as /Volumes/ExternalDrive/clone.img. You'll want to replace "ExternalDrive" with the name of your own externally connected drive.

The last part of the command bs=1m means to copy in block sizes of 1 megabyte. This just speeds up the operation.

10
  • @user3439894 Good catch! - When writing, I was very aware of what I wrote there because I always mix up M and m because M is the valid syntax on dd for Linux, and m is the valid syntax on dd for macOS. So I focused on that and didn't notice the typo :-)
    – jksoegaard
    Commented Jul 17, 2019 at 12:01
  • Ah, didn't see that, sorry.
    – nohillside
    Commented Jul 17, 2019 at 12:12
  • RE: "Also, if your original drive has been mounted for some reason while in Recovery mode - unmount it from Disk Utility." When booting to the Recovery HD from the main startup disk, the e.g. Macintosh HD will be mounted and you cannot unmount the drive but you can unmount the volume. Also, I'd boot the Mac from an e.g. macOS USB Installer with the external drive attached and then and use Terminal from there to clone the internal drive to the external drive after unmounting the internal drive. Commented Jul 17, 2019 at 12:50
  • Unmounting the volume will unmount the file system which is what we’re interested in. Booting from a USB installer isn’t going to make the situation better or worse. It’s just more hassle.
    – jksoegaard
    Commented Jul 17, 2019 at 18:50
  • RE: "Unmounting the volume will unmount the file system which is what we’re interested in", yes, but that is not what you said and why I differentiated volume from drive as you said, or even disk, as both refer to the entire physical drive. Also, booting from an macOS USB Installer gives one the opportunity to image the entire physical drive not just a volume. In other words, make it of the entire physical internal drive. Commented Jul 17, 2019 at 19:04
0

Update for APFS:

When an APFS volume is mounted, trim is performed automatically [1]. Once the SSD is trimmed, there is basically 0% chance of getting the data back. Therefore, you should avoid (re)mounting the internal data volume again. This happens automatically when you enter Recovery. For example, you might boot up your mac into a linux system on an external drive and run dd there. You should also power down the mac as soon as possible to avoid overwriting the blocks that contain the file data or to avoid further updates to filesystem metadata that might affect future rescue efforts.

For Apple Silicon macs and later versions of macOS, some security restrictions might make this task [making a readable block-level copy of your disk without it being trimmed] impossible, such as 1TR and secure enclave/ssd encryption. I'm not an expert on these so I might be wrong here.

You must log in to answer this question.

Not the answer you're looking for? Browse other questions tagged .