19

My screenshots go directly to my clipboard, which works for me most of the time, so I'm not trying to change that behavior.

What I want to do is paste said screenshot into a folder of my choosing.

Finder doesn't seem to let me paste my screenshots from my clipboard into folders, so now I'm looking for a workaround that uses as few steps as possible.

The suboptimal Approach: I've found that I can open these images from my clipboard in Preview, but then I have to re-save them to a desired folder, which is too cumbersome to be considered a solution.

What I'm looking for: Something with fewer steps than the above approach. I just need to get the image from my clipboard into a folder of my choosing. If you can do better, you'll save me and others a lot of time.

15
  • 2
    Welcome to Ask Different :) My screenshots go directly to my clipboard, which works for me most of the time, so I'm not trying to change that behavior. How have you set this up? By default screenshots in macOS are saved on Desktop.
    – Nimesh Neema
    Commented May 21, 2020 at 15:59
  • Understood. I have it set up so they go to my clipboard. What I'm asking is how to get an image from my clipboard to a folder that I decide after I've taken the screenshot. Commented May 21, 2020 at 16:02
  • What version of macOS are you using? Also, what format do you want the clipboard image to be saved as, e.g. PNG? Commented May 21, 2020 at 16:15
  • Im not understanding why the need to change the default behavior of getting a screen shot, because all you have do do to send it to the clipboard is hold ‘Control’ while you take it. Anyway...you have to paste it to something that will save it as a file - you can’t get around that requirement.
    – Allan
    Commented May 21, 2020 at 17:11
  • 1
    @Allan, RE: "I'm not sure why there's so much debate around the fact that the clipboard cannot write files to the disk" -- I never said the clipboard could write files to disk! Why don't you just leave it at the fact that the statement you made "Anyway...you have to paste it to something that will save it as a file - you can’t get around that requirement." is not true! There is no pasting involved in what I've written to write the graphic image data to disk file and is not in app form but could also be if I wanted. Why you have tried to escalate this is beyond me! Commented May 21, 2020 at 20:19

5 Answers 5

5

Edit/Re-Write # 2:

My earlier answers were wrong, and while troubleshooting, new (and likely better) answers have been posted. Nevertheless, I've finally got a correct answer, so I'm going to post it. I've tested it with screenshots on my 10.15.4 system, and it worked reliably in my (limited) testing. As there were already answers to this question that required only minor adaptation, I relied heavily upon them - this one, and this one in particular, both posted by @CJK.

This answer requires use of the command line. It uses only resources that are native to macOS 10.15.4, and there are no work-arounds offered. Here's what I did:

Start the Terminal app, and then from the shell (zsh) prompt (%) start the editor of your choice to open the ~/.zshrc file in your "home" ($HOME) directory. I've used nano here:

% nano ~/.zshrc

When the editor opens, you may have only an empty file - that's fine. If there is something in the file, just move the insertion point to the end of the file, then copy and paste the following text into the editor:

function pss () {
    folder=$(pwd)
    filename="Screen Shot $(date +%Y-%m-%d\ at\ %H.%M.%S).png"

    if [ $# -ne 0 ]; then
        if [[ -d $1 ]]; then
            if [ "$1" != "." ]; then folder=$1; fi
        else
            a=$(dirname "$1")
            b=$(basename "$1" .png)

            if [ "$b" != "" ]; then filename=$b.png; fi

            if [ "$a" != "." ]; then folder=$a; fi
        fi
    fi

    osascript -e "tell application \"System Events\" to ¬
            write (the clipboard as «class PNGf») to ¬
            (make new file at folder \"$folder\" ¬
            with properties {name:\"$filename\"})"
}

Save the file, and exit the editor. You have now created a shell function named pss (for paste screen shot).

Before you can use this shell function, you'll need to source this change to zsh (a logout/login, or reboot will accomplish the same thing, but this is easier):

% . ~/.zshrc
# OR, ALTERNATIVELY:
% exec zsh

Take a screenshot as you've configured it now - with the output going to the clipboard.

Finally, use the pss function to copy/save the screenshot to the a file in your desired location:

% pss /Users/yourid/yourfolder

A couple of notes:

  1. The filename has been set in the pss function to approximate the default filename used by the system for screenshots. If you wish to change that, modify the following line:
filename="Screen Shot $(date +%Y-%m-%d\ at\ %H.%M.%S).png"
  1. You do not need to always specify the folder location. If you cd to the directory in which you wish to save your screenshot files, you can simply run the pss function without an argument. For example, you wish to save your screenshot files to /Home/user/screenshots:
% cd /Home/user/screenshots
# make your screenshot
% pss
# the screenshot file is created in this (the `pwd`) directory
1
  • The default in macOS Catalina, as well as previous version of macOS, for US English, is e.g., Screen Shot 2020-05-22 at 1.32.55 AM.png, not e.g. Screen Shot 2020-05-22 at 01.32.55.png as you've coded. For the default, with the aforementioned Language & Region setting, the time string would be represented as %l.%M.%S %p as shown I'm my answer. Obviously, this specific format will differ based on Language & Region setting, but in this particular use case will be as it's defined in the script. Commented May 22, 2020 at 5:34
4

I combined user3439894's approach with Automator. Result: ^ + + + v to paste the clipboard to the current folder.

Step 1

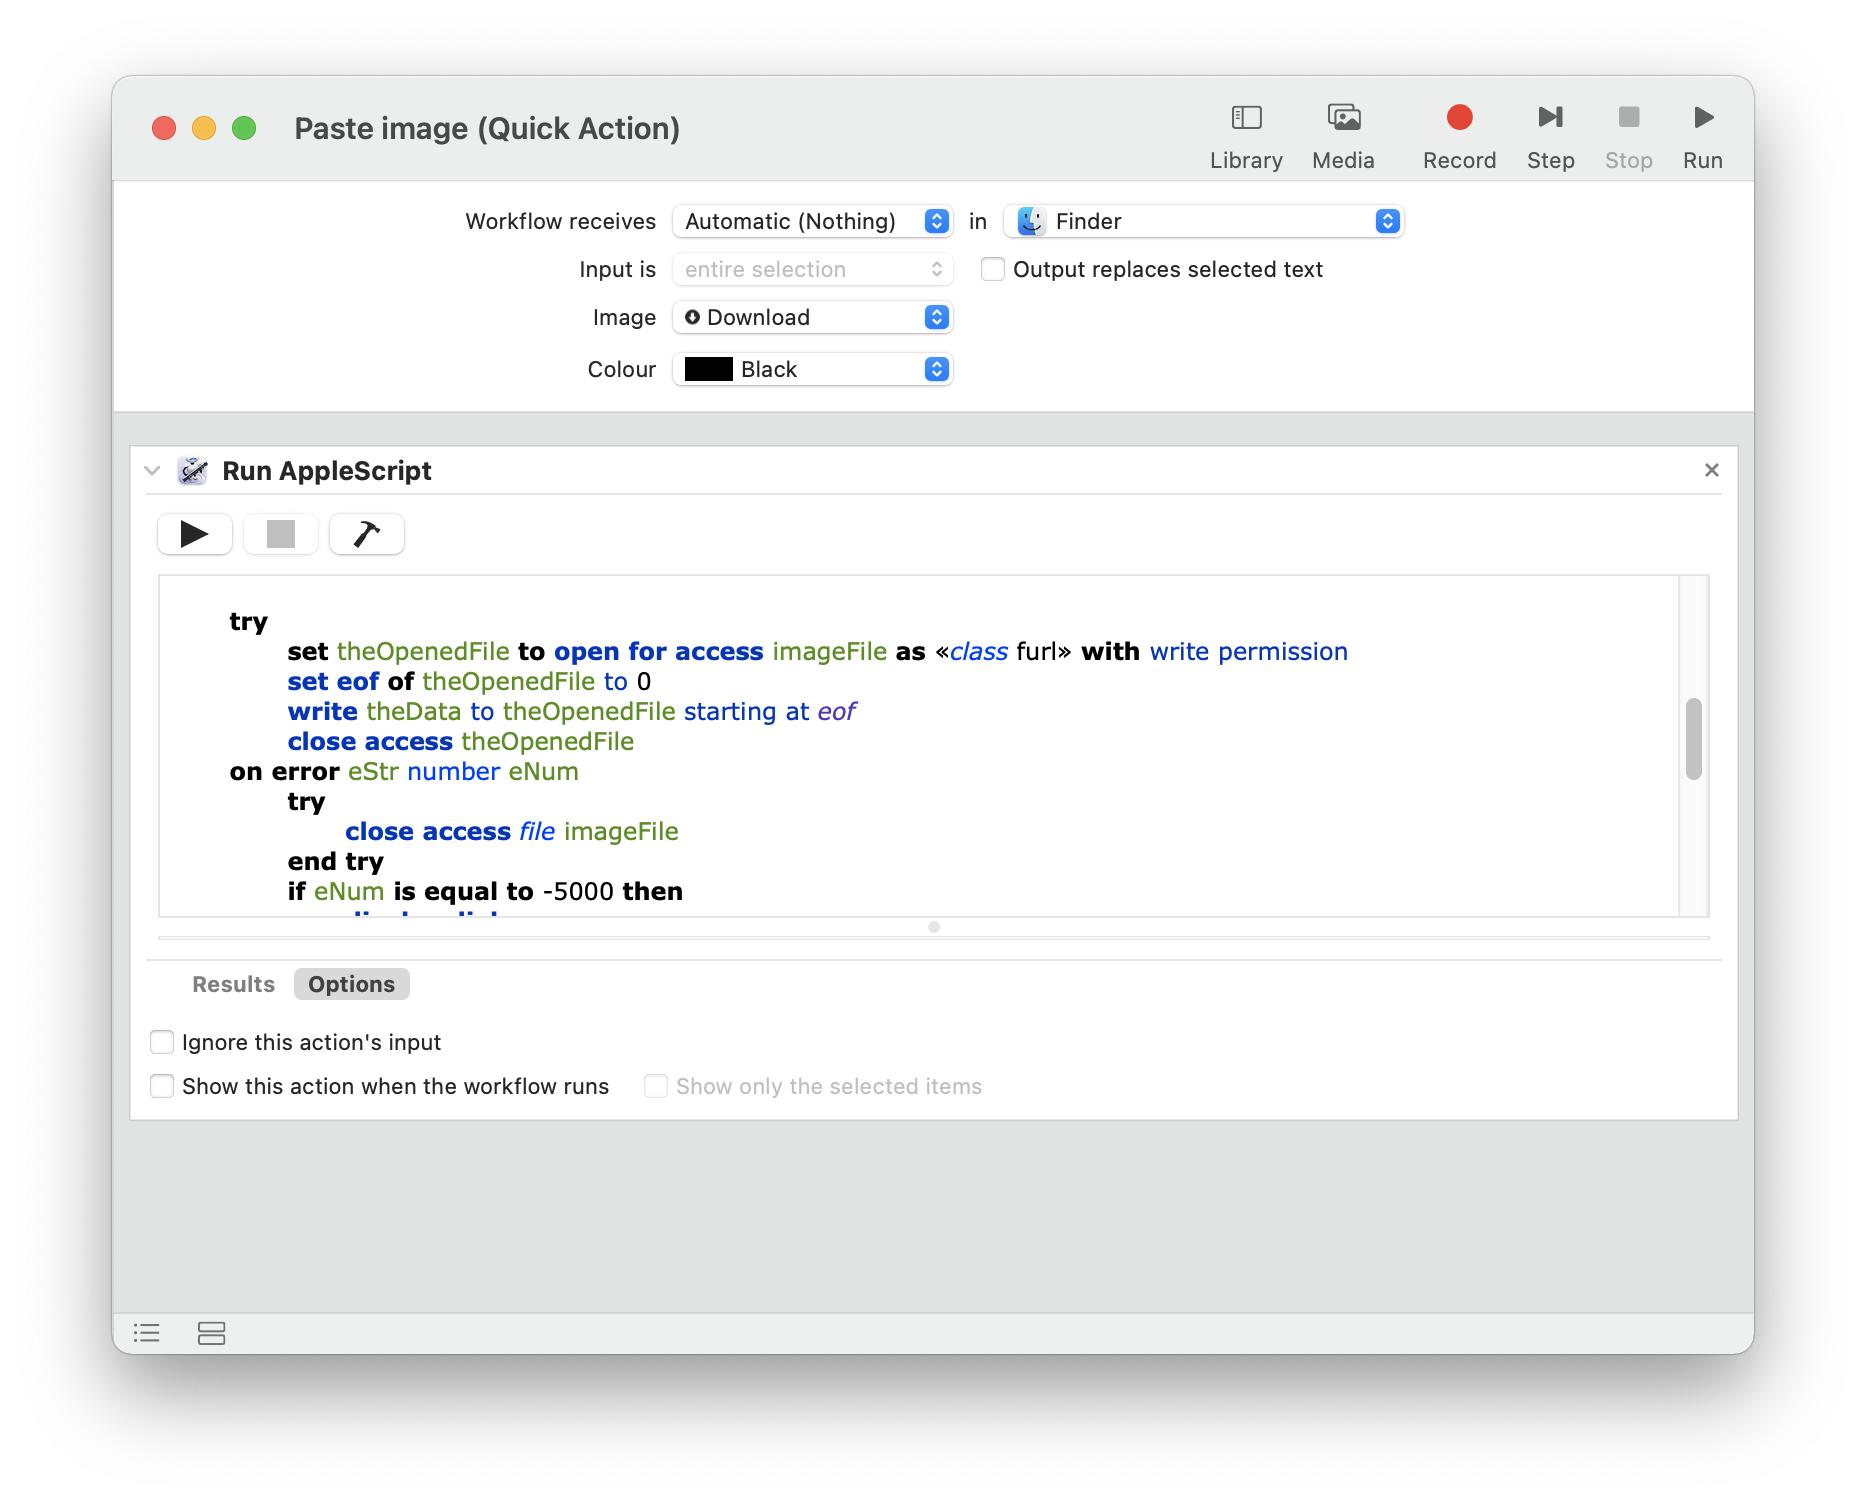
Create a new "Quick Action" in Automator.app and add the following Run AppleScript block: enter image description here

set imageType to «class PNGf»

if ((clipboard info) as string) contains imageType then
    set theData to (the clipboard as imageType)
    
    -- path
    tell application "Finder" to set saveToLocation to (target of front Finder window) as text
    
    -- filename
    set fileName to do shell script ¬
        "echo $(date '+Screen Shot %Y-%m-%d% at %l.%M.%S %p.png')"
    
    set imageFile to saveToLocation & fileName


    try
        set theOpenedFile to open for access imageFile as «class furl» with write permission
        set eof of theOpenedFile to 0
        write theData to theOpenedFile starting at eof
        close access theOpenedFile
    on error eStr number eNum
        try
            close access file imageFile
        end try
        if eNum is equal to -5000 then
            display dialog ¬
                "You do not have write permission to this location!" buttons {"OK"} ¬
                default button 1 with title "File I/O Error..." with icon stop
            my chooseLocationAndWriteFile(imageType, fileExtension, defaultChooseFolderLocation)
        else
            display dialog eStr & " number " & eNum ¬
                buttons {"OK"} default button 1 ¬
                with title "File I/O Error..." with icon stop
        end if
        return
    end try
    
    
else
    display dialog "The clipboard does not contain graphic image data!" buttons {"OK"} ¬
        default button 1 with title "Write Clipboard Graphic Image Data to File" with icon caution
end if

Save the action to the default iCloud folder.

Step 2

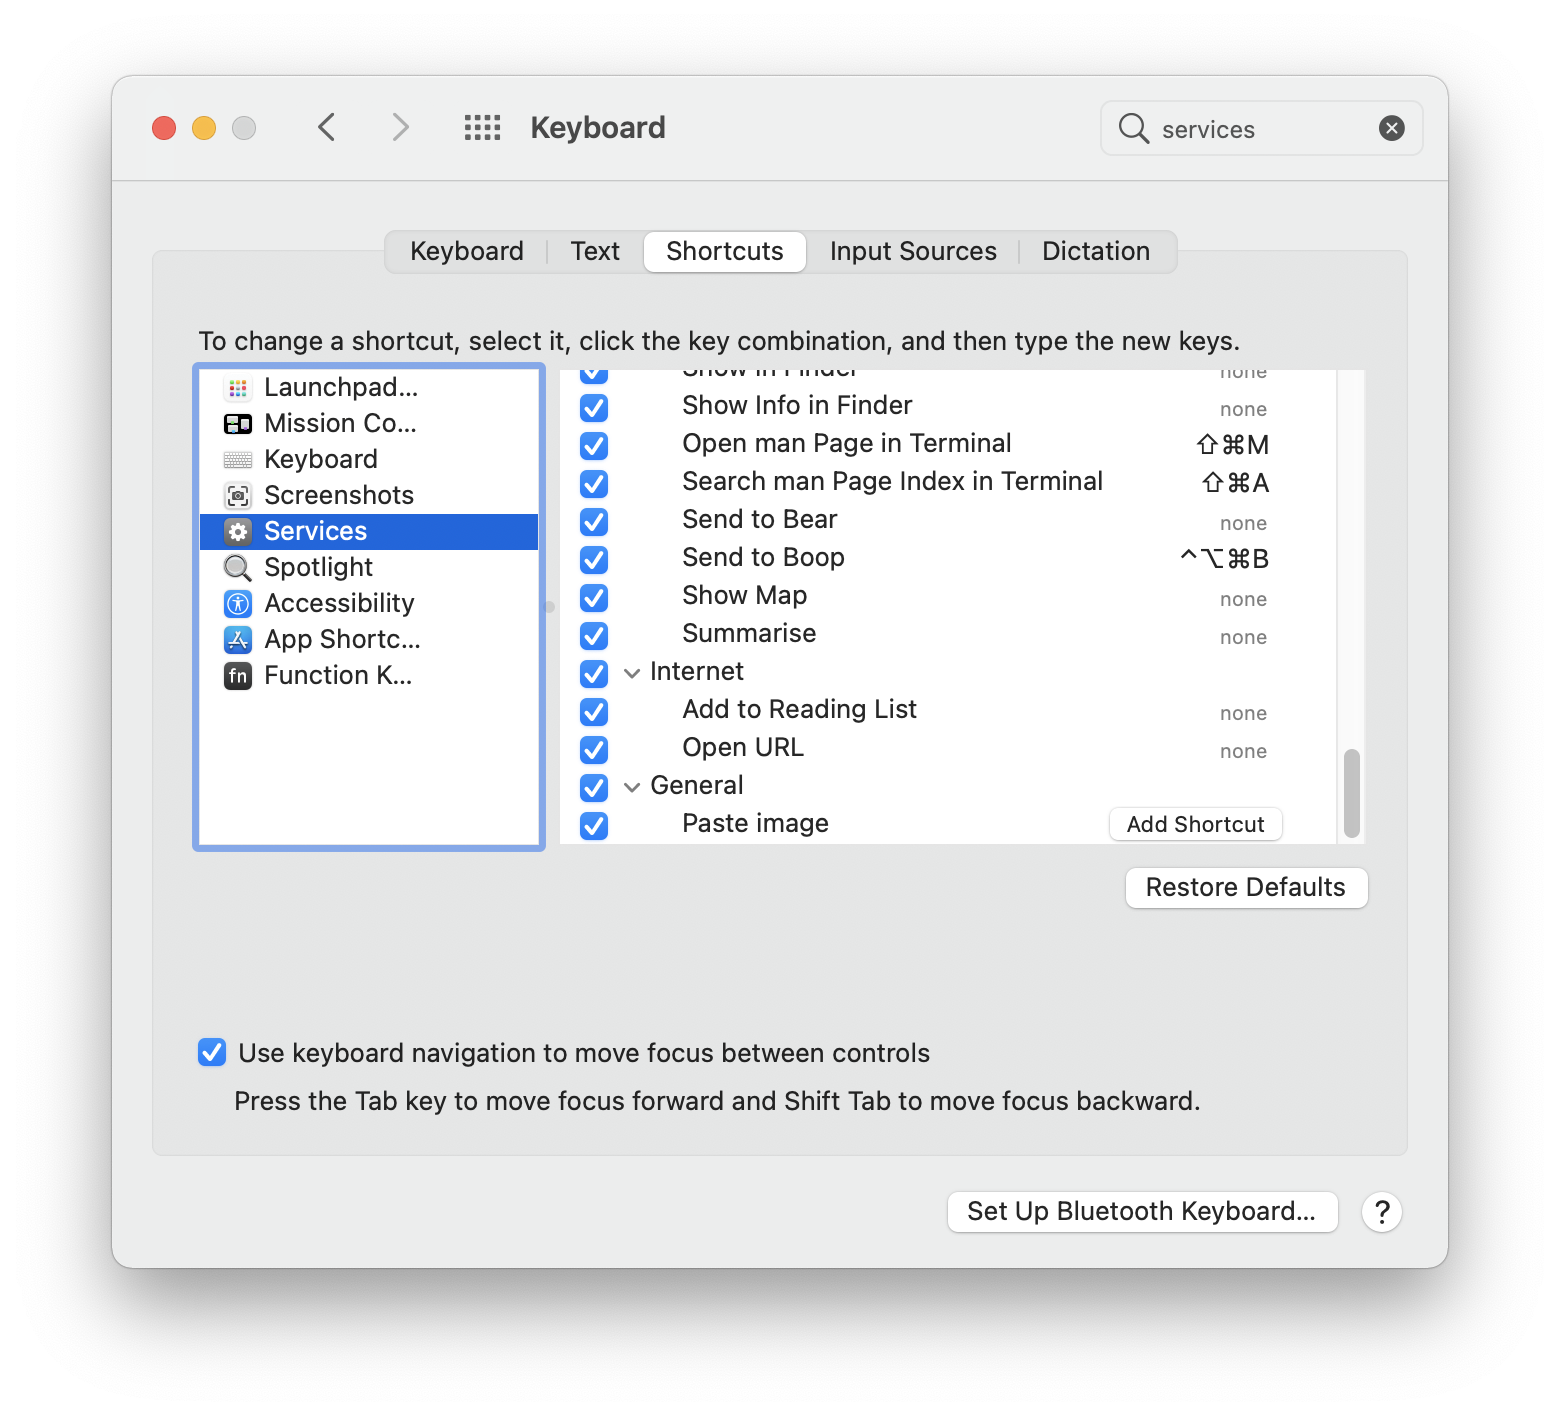
In System Settings > Keyboard > Shortcuts > Services, the new Quick Action should appear:

enter image description here

Adding a shortcut here didn't work for me 🤷‍♂️, so…

Step 3

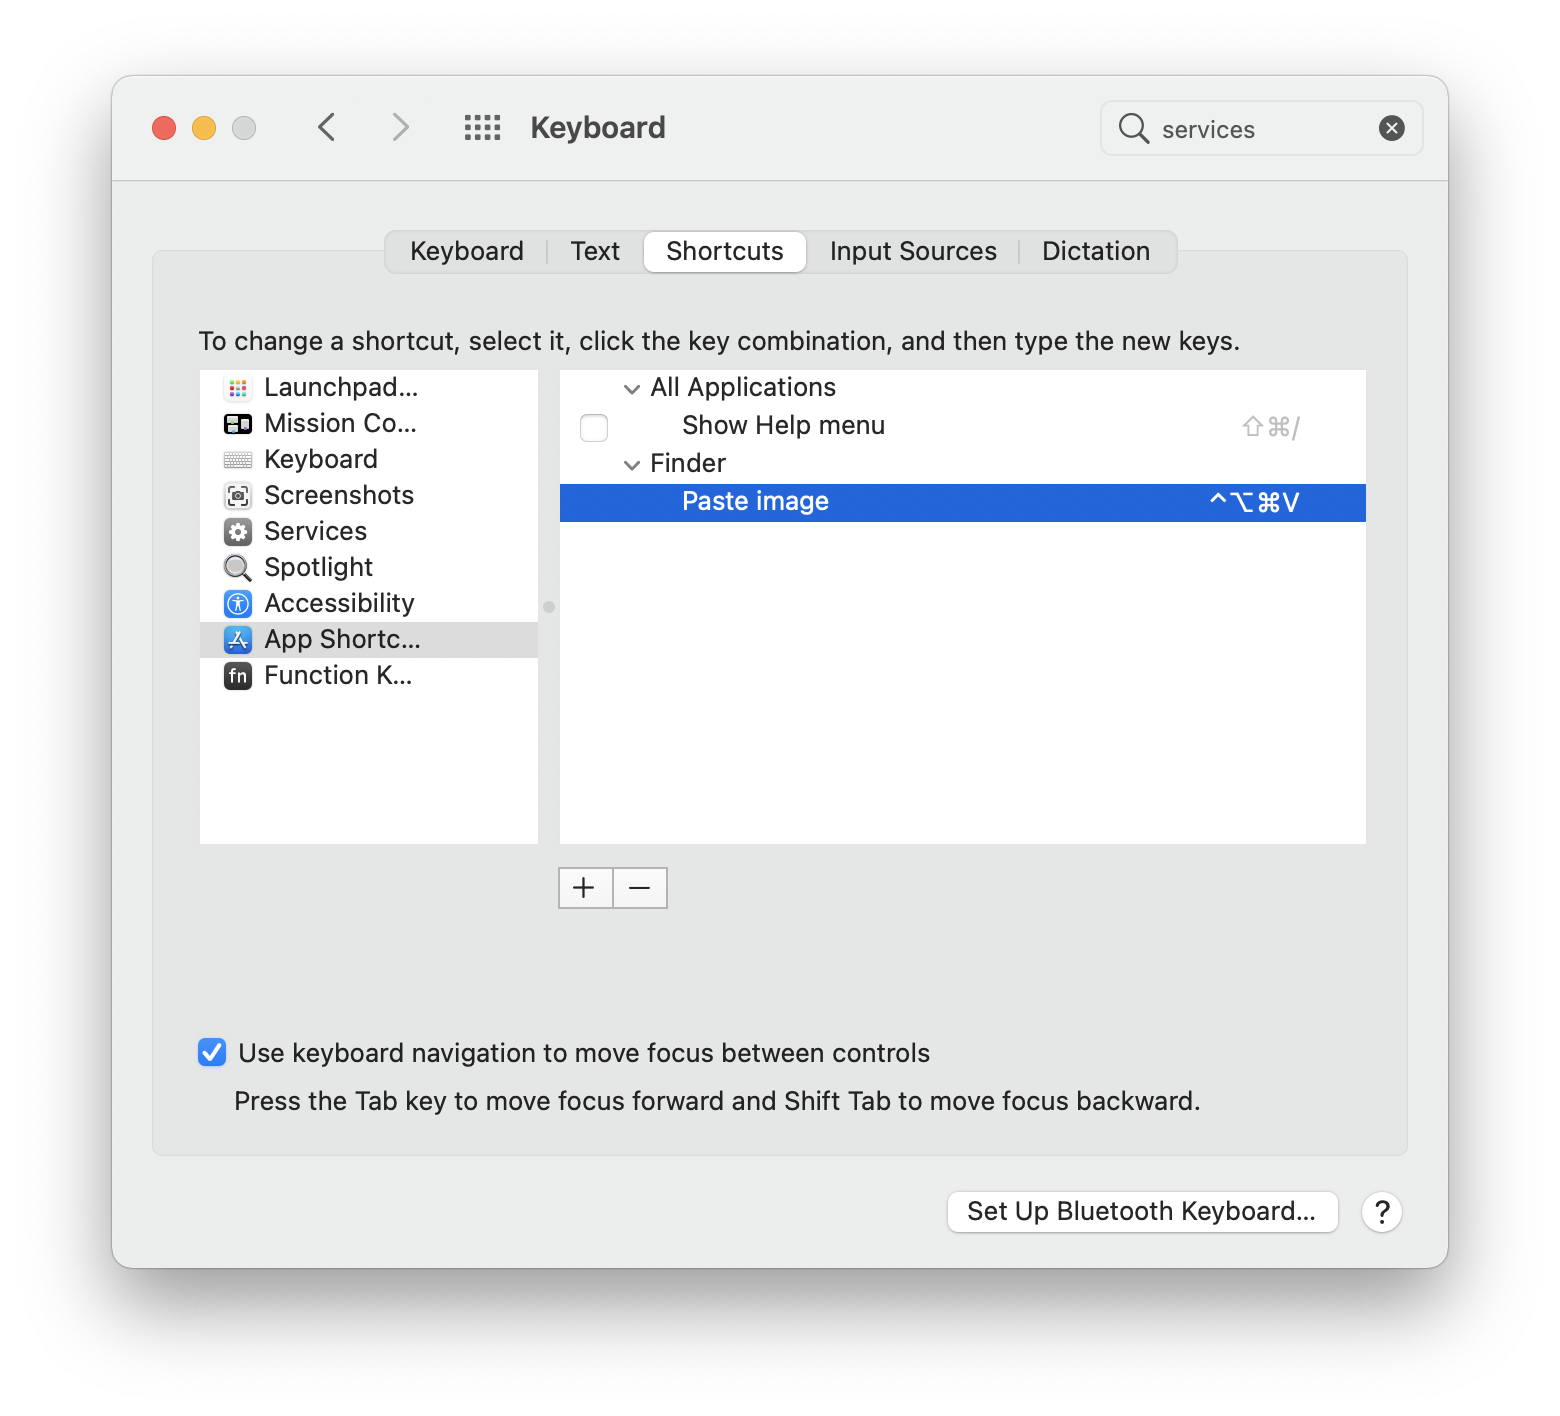
In the "Application Shortcuts", add one with the exact name of your file:

enter image description here

That's it!

1
  • 1
    This worked perfectly, but on macOS Sonoma 14.0 I didn't need Step 3, as adding the keyboard shortcut under services as demonstrated on Step 2 worked (set it as cmd+shift+v).
    – Ulm
    Commented Jul 26 at 7:24
3

I created an automator workflow to solve this problem

Bottom line: the solution allows you to save an image from the clipboard anywhere with one keystroke (you have to show it where to go in the save dialogue, obviously)

The workflow opens preview, creates a new file from the clipboard, and saves the file (opening the save as dialogue). You can then put it wherever you want. Here's the link to a zip with the workflow. To run the workflow, you'll probably need to approve automator with certain permissions (it'll pop up if and ask for approval, so don't worry if you don't run into this problem). Open the zip, then double click the file (make sure there's an image in the clipboard). A new file should open in preview and ask to be saved.

To create a shortcut, just go to 'keyboard' under system preferences > 'shortcuts' > 'services' and setup the shortcut.

1
  • I worked, but every time I invoke the action it prompts me to enter my password. Is there a way to disable this behavior? Commented Aug 1, 2023 at 10:00
3

Use pngpaste.

Install it with brew install pngpaste, then run

$ pngpaste /desired/path/of/you/png/file.png # modify this line

And your clipboard image is saved to the folder /desired/path/of/you/png with the name file.png.

How to run brew install pngpaste? Just paste the command into the Terminal app. If it says brew: command not found, visit https://brew.sh for instructions for installing Homebrew.

1

On occasion, I too have graphic image data from a screen shot on the clipboard and have used a very stripped down version of the example AppleScript code shown further below to write it to a disk file. However, I've rewritten it so all you have to do is set the value for two variables, read the comments in the code, then save the script using Script Editor. Then you can trigger it from a keyboard shortcut using an app like FastScripts or similar.

This way you do not need to give every application that has focus separate permission to run it, like you would if you used an Automator Service/QuickAction set to any application. (Or you could just set it to one application, e.g. Finder and then only trigger it from there.)

FastScripts is free for up to 10 keyboard shortcuts. Note that I'm not affiliated with the developer of this product, just a satisfied user.

Save the following example AppleScript code as a script named e.g. Write Clipboard Graphic Image Data to File, then assign it a keyboard shortcut in FastScripts, I used ⇧⌘6, and start using it. Note that you can also use it in a Run Shell Script action in an Automator Service/QuickAction if you want to, but FastScripts is the way to go.

If you want to hard code a location, instead of a choose folder dialog, just let me know and I can change the code.

What this example AppleScript code does:

  • Checks the clipboard to see if it contains graphic image data and if not informs the user.
  • If the clipboard does contain graphic image data a choose folder dialog opens.
  • Choose the location to save the graphic image data from the clipboard to file, and it does, unless you do not have write permission to that location, you are warned and then choose again.
  • The naming convention is, e.g.: Screen Shot 2020-05-21 at 9.34.29 PM.png

Example AppleScript code:

--  #
--      ### Write Clipboard Graphic Image Data to File ###
--  #
--  # This example AppleScript code will write graphic image data in its normal form on the clipboard to disk file.
--  # All you need to do is set the value of the fileExtension variable to the type of graphic image file you want.
--  # Then when the script runs, a choose folder dialog box will appear, you select a location and click the Choose button.
--  # The graphic image data in its normal form on the clipboard is written to disk file with the following naming convention:
--  # 'Screen Shot 2020-05-21 at 9.34.29 PM.fileExtension' e.g. 'Screen Shot 2020-05-21 at 9.34.29 PM.png'


--  # Set the value of the fileExtension variable 
--  # to the type of graphic image file you want.
--  # 
--  # Valid values are: png, jpg, tiff, gif

set fileExtension to "png"

--  # The defaultChooseFolderLocation is the default
--  # location the choose folder dialog opens to.
--  # It can be any properly formed AppleScript 
--  # 'path to (folder)', or use a fully qualified POSIX path.

set defaultChooseFolderLocation to path to (pictures folder)


--  ########################################
--  ## Do Not Edit Below Unless You Know What You Are Doing. ##
--  ########################################


--  # With the exception of the file naming convention, the rest 
--  # of the code is tokenized and should not need to be edited.
--  # Obviously though, feel free to edit it if you so choose.

if fileExtension is equal to "png" then
    set imageType to «class PNGf»
else if fileExtension is equal to "jpg" then
    set imageType to JPEG picture
else if fileExtension is equal to "tiff" then
    set imageType to TIFF picture
else if fileExtension is equal to "gif" then
    set imageType to GIF picture
else
    display dialog "The file extension set is not recognized!" buttons {"OK"} ¬
        default button 1 with title "Write Clipboard Graphic Image Data to File" with icon stop
    return
end if


if ((clipboard info) as string) contains imageType then
    my chooseLocationAndWriteFile(imageType, fileExtension, defaultChooseFolderLocation)
else
    display dialog "The clipboard does not contain graphic image data!" buttons {"OK"} ¬
        default button 1 with title "Write Clipboard Graphic Image Data to File" with icon caution
end if


--  ## Handler(s) ##

on chooseLocationAndWriteFile(imageType, fileExtension, defaultChooseFolderLocation)
    set cbImage to (the clipboard as imageType)
    set fileName to do shell script ¬
        "echo $(date '+Screen Shot %Y-%m-%d% at %l.%M.%S %p." & fileExtension & "')"
    set saveToLocation to POSIX path of (choose folder with prompt ¬
        "Choose the Folder to save the clipboard image to..." default location ¬
        defaultChooseFolderLocation)
    set imageFile to saveToLocation & fileName
    my writeToFile(cbImage, imageFile, true, imageType, fileExtension)
end chooseLocationAndWriteFile

on writeToFile(theData, theFile, overwriteExistingContent, imageType, fileExtension)
    try
        set theOpenedFile to open for access POSIX file theFile with write permission
        if overwriteExistingContent is true then set eof of theOpenedFile to 0
        write theData to theOpenedFile starting at eof
        close access theOpenedFile
    on error eStr number eNum
        try
            close access file theFile
        end try
        if eNum is equal to -5000 then
            display dialog ¬
                "You do not have write permission to this location!" buttons {"OK"} ¬
                default button 1 with title "File I/O Error..." with icon stop
            my chooseLocationAndWriteFile(imageType, fileExtension, defaultChooseFolderLocation)
        else
            display dialog eStr & " number " & eNum ¬
                buttons {"OK"} default button 1 ¬
                with title "File I/O Error..." with icon stop
        end if
        return
    end try
end writeToFile

Note: The example AppleScript code is just that and does not contain any additional error handling as may be appropriate. The onus is upon the user to add any error handling as may be appropriate, needed or wanted. Have a look at the try statement and error statement in the AppleScript Language Guide. See also, Working with Errors. Additionally, the use of the delay command may be necessary between events where appropriate, e.g. delay 0.5, with the value of the delay set appropriately.

You must log in to answer this question.

Not the answer you're looking for? Browse other questions tagged .